Budget Video Editing: Premiere Pro Tips
Table of Contents
Premiere Pro Tips for Cost-Effective Post-Production – Venturing into the realm of video editing doesn’t necessarily demand a hefty investment, especially when using Adobe Premiere Pro. As a powerful editing tool favoured by professionals and beginners alike, Premiere Pro offers a multitude of features that can turn your raw footage into polished stories, even on a tight budget. It’s imperative to familiarise oneself with the essentials of the Premiere Pro interface and take advantage of built-in tools and techniques that expedite the editing process without compromising quality.
Understanding the fundamentals of setting up a project and mastering keyframe basics is just the beginning. Efficient workflow can be significantly enhanced by utilising keyboard shortcuts, and achieving professional video and audio quality can be accomplished through in-app features designed for colour correction, grade enhancements, and audio adjustments. For those seeking to produce high-calibre videos without the high costs, learning the ins and outs of Premiere Pro is a budget-friendly solution that still delivers results.
Understanding the Premiere Pro Interface
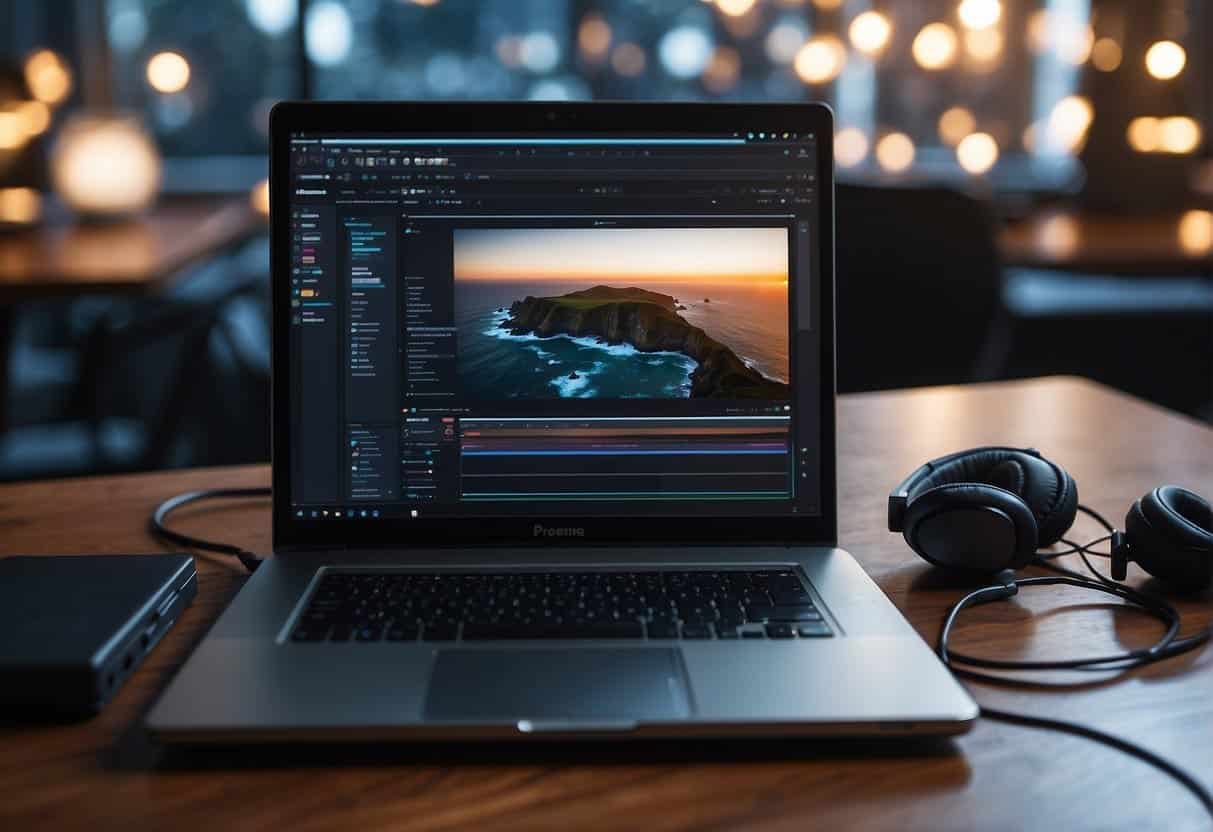
To master the art of video editing with Adobe Premiere Pro, familiarisation with its user interface is essential. The workspace is designed to enhance your workflow, making it efficient and intuitive when navigating through various elements such as the Toolbar, Timeline, and Media Browser.
Navigating the Toolbar and Timeline
The Toolbar in Premiere Pro is where you’ll find essential editing tools like the Selection Tool, Razor Tool, and Pen Tool. Becoming adept at using the Toolbar can significantly expedite your editing process. The Timeline, on the other hand, is where clips are arranged and manipulated over time. It’s crucial to understand how to effectively manage tracks, clips, and sequences to maintain a smooth and organised workflow.
Utilising the Program Monitor Toolbar
Within the Program Monitor, the Toolbar appears at the bottom and offers quick access to frequently used functions such as playhead navigation and marking in/out points. This toolbar facilitates real-time previewing of your edits and is invaluable for making precise adjustments to your footage.
Managing Media with the Media Browser
The Media Browser panel is where you’ll import and organise your media files. It supports a wide range of formats and allows you to preview files before importing them into your project. Effectively managing your media is fundamental to maintaining an efficient edit, as it reduces the time spent searching for assets and prevents clutter within your project.
By understanding these components of the Premiere Pro interface, we set ourselves up for a more productive and streamlined editing experience.
Setting Up Your Project

Before delving into Adobe Premiere Pro, setting up your project correctly is crucial. Efficient workflow and organisation are the foundations that will streamline your video editing process.
Starting with the Correct Sequence Settings
When initiating a new project in Premiere Pro, selecting the right sequence settings is our first step. These settings should match our footage’s resolution and frame rate to ensure uniformity and prevent unnecessary rendering. For example, if our footage is 1080p at 25fps, our sequence should reflect these exact specifications. Incorrect settings can lead to extra work; adjusting every clip’s size or conversion could become a struggle, affecting efficiency.
Importance of Organising Files
Next, we must ensure our files are well-organised within Premiere Pro. From our experience, colour-coding our clips and renaming our assets makes it easier to navigate and manage our project. By organising our media into bins within the Project browser, similar to how we might organise files on our computer, we enhance our workflow. Setting in and out points before inserting clips into our timeline is a practice that saves us time and keeps edits clean.
By laying out our process clearly, we establish a strong foundation that benefits the entirety of our video editing skills. As we’ve seen across various projects, these initial steps are non-negotiable for a successful edit.
Essential Editing Tools and Techniques
Editing is an art that relies heavily on precision and timing. To achieve a polished look on a budget, we’ll focus on three key techniques within Adobe Premiere Pro that are essential for seamless video editing.
Using the Razor Tool for Quick Edits
The Razor Tool is a fundamental tool we often utilise when we need to make swift cuts. To use it, simply select the Razor Tool from the toolbar or press ‘C’ on your keyboard, then click on the point in the timeline where you want the cut. It’s crucial for quick splitting of clips without affecting the rest of your timeline.
Setting In and Out Points Effectively
In and Out points are what dictate the portions of a clip that make it into the final sequence. These can be set by dragging the playhead to the desired start and end positions and pressing ‘I’ for In and ‘O’ for Out. This ensures we use only the best parts of our footage, reducing unnecessary data in the project.
Cutting Clips and Managing B-roll
Cutting clips effectively ties into the narrative we are trying to build. It’s not just about shortening; it’s considering the pacing and flow of your video. B-roll, additional footage that supports your main shots, is invaluable for this. We strategically intercut B-roll to cover cuts, add depth or provide context, enhancing the storytelling element of our projects.
When we apply these techniques skillfully, we ensure our video projects are engaging and appear seamlessly executed, even when working within budget constraints. These are just the basics, but with Premiere Pro, even the simplest tools can create powerful effects when used creatively. Remember, editing is as much about the clips you remove as those you include.
Keyframe Basics and Animation
Keyframes are the cornerstone of animation in video editing, allowing us to define changes in movement, effects, and other properties over time. By mastering keyframes, we can create visually stunning and dynamic content even on a budget.
Creating Smooth Transitions with Keyframes
Transitions are vital in making your video flow. The key to smooth transitions is the careful placement and manipulation of keyframes. Begin by selecting the point on your timeline where you want a transition to start. Add a keyframe by clicking the toggle animation button, usually represented by a stopwatch icon. Move to the point where you want the transition to end and add another keyframe. You can adjust the spacing between keyframes to manage the speed of the transition.
- Click the stopwatch icon to activate keyframing for the desired property.
- Move the playhead to your desired end point and change the value to set the end keyframe.
- To smooth out the transition, right-click on a keyframe and select ‘Ease In’ or ‘Ease Out’ for more natural movement.
Animating Text and Graphics
Animating text and graphics adds a professional touch that can engage your audience. Select the text or graphic clip in the timeline. Then, just as with transitions, use the toggle animation button to begin keyframing. Adjust position, scale, and rotation attributes at different points on the timeline to make the graphic or text move across the screen.
- Position: Set keyframes and move the text or graphic on the X and Y axis for horizontal or vertical movement.
- Scale: Gradually increase or decrease the size to create a zoom effect.
- Rotation: Rotate your element around its anchor point to add dynamic motion.
For a touch of expertise, “ProfileTree’s Digital Strategist – Stephen McClelland” suggests: “Incorporate motion blurs and adjust the path of animation with bezier curves to achieve more natural-looking movements within your video projects.”
Remember, the power of keyframe animation lies in your ability to control the timing and interpolate between keyframes, so spend time to finesse and smooth out animations for that polished look. By applying these techniques, even simple text and graphics can be elevated to a more professional, eye-catching level.
Optimising Workflow with Keyboard Shortcuts
Using keyboard shortcuts in Adobe Premiere Pro not only accelerates the video editing process but also significantly boosts efficiency. By mastering these combinations, we can cut down on editing time and focus more on the creative aspects of our projects.
Essential Shortcuts for Speed and Efficiency
To enable speed and efficiency during our editing workflow, it is imperative to become familiar with certain keyboard shortcuts in Premiere Pro. Here’s a quick reference table for some essential shortcuts:
| Action | Windows Shortcut | Mac Shortcut |
|---|---|---|
| New Project | Ctrl + Alt + N | Cmd + Opt + N |
| New Sequence | Ctrl + N | Cmd + N |
| Ripple Delete | Shift + Delete | Shift + Delete |
| Cut | Ctrl + K | Cmd + K |
| Copy | Ctrl + C | Cmd + C |
| Paste | Ctrl + V | Cmd + V |
| Select All | Ctrl + A | Cmd + A |
| Deselect All | Ctrl + Shift + A | Cmd + Shift + A |
| Zoom In | + | + |
| Zoom Out | – | – |
| Render In to Out | Enter | Return |
For instance, mastering simple shortcuts like Cut (Ctrl + K for Windows or Cmd + K for Mac) can drastically reduce the time taken to split clips, while Zoom In and Out (+/- keys) allow for quick navigation along the timeline.
Enhancing your workflow with these Adobe Premiere Pro Shortcuts can transform your video editing from a slow and tedious process into a fast-paced and enjoyable experience.
Customising Shortcuts for Personal Workflow
Premiere Pro provides the flexibility of customising shortcuts to fit our personal editing styles, which can be a game-changer for thriving in a budget-conscious video editing environment. By tailoring shortcuts to our needs, we save time and foster a more intuitive editing process. To customise, select Edit > Keyboard Shortcuts from the main menu. We can choose from existing presets or create our own set, associating each task with a key combination that resonates with our editing rhythm.
For example, if we frequently use the Ripple Edit Tool, we might assign a shortcut that’s more convenient than the default, ensuring that this frequently used command is always at our fingertips.
It is essential to remember that while adapting to customised shortcuts might take some time, the initial effort will pay off exponentially in terms of productivity and workflow efficiency.
By incorporating these actionable tips into our editing routine, we streamline our workflow and yield better results in less time. It’s about working smarter, not harder, and keyboard shortcuts are the epitome of this mindset in the realm of budget video editing.
Achieving Professional Video and Audio Quality
When editing video on a budget, achieving high-quality results is paramount. With Adobe Premiere Pro, professional editors have access to powerful tools to enhance video and audio, even with limited resources. We’ll focus on balancing and syncing audio levels to ensure clarity and on utilising the Warp Stabilizer effect to smooth out shaky footage, two crucial steps towards professional-quality production.
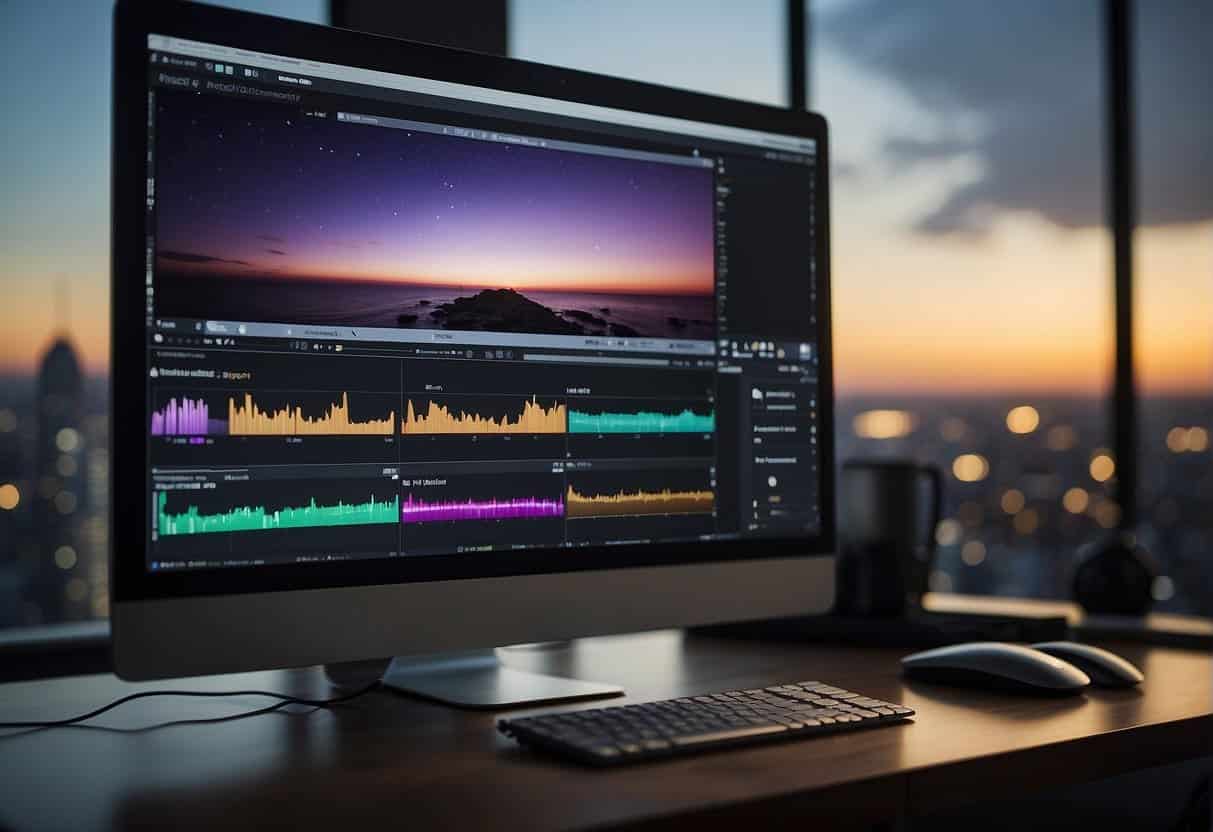
Balancing and Syncing Audio Levels
In video production, audio levels are as critical as the visuals. To balance and sync audio in Adobe Premiere Pro, start by importing your clips and aligning them on the timeline. A quick tip for efficiency: right-click and choose ‘Synchronise’, making sure your audio is perfectly in sync with the video. After syncing, use Premiere Pro’s Audio Clip Mixer to adjust and balance the audio tracks. Ensure the audio levels peak around -6 dB to -3 dB to prevent distortion. For dialogue, consistency is key; you don’t want your audience to strain to hear a conversation.
Further fine-tuning can be achieved by using audio effects such as compression, EQ, and noise reduction to clean up the sound. Remember, audio that is crisp and well-balanced against the background music or effects can make a considerable difference in the viewer’s experience.
Stabilising Shaky Footage with Warp Stabilizer
Shaky footage can be distracting and detract from the viewer’s experience. Warp Stabilizer, a powerful tool in Premiere Pro, can transform unsteady clips into smooth, cinematic sequences. To apply it, select your clip, go to ‘Effects’, and type in ‘Warp Stabilizer’. Drag and drop the effect onto your shaky clip. Adobe Premiere Pro will analyse the footage, and the stabilisation will begin.
Patience is required here, as the stabilisation process can take some time, especially for longer clips. Once completed, you can adjust settings like ‘Smoothness’ and ‘Method’ to find the right balance. A note from ProfileTree’s Digital Strategist – Stephen McClelland, “The Warp Stabilizer is a game-changer, but use it judiciously — over-stabilising can create an unnatural look, detracting from the authentic feel of your video.”
By demonstrating these techniques, we arm you with the knowledge to achieve professional results in your video projects, without breaking the bank. Remember, exceptional video and audio quality can significantly elevate your content and captivate your audience.
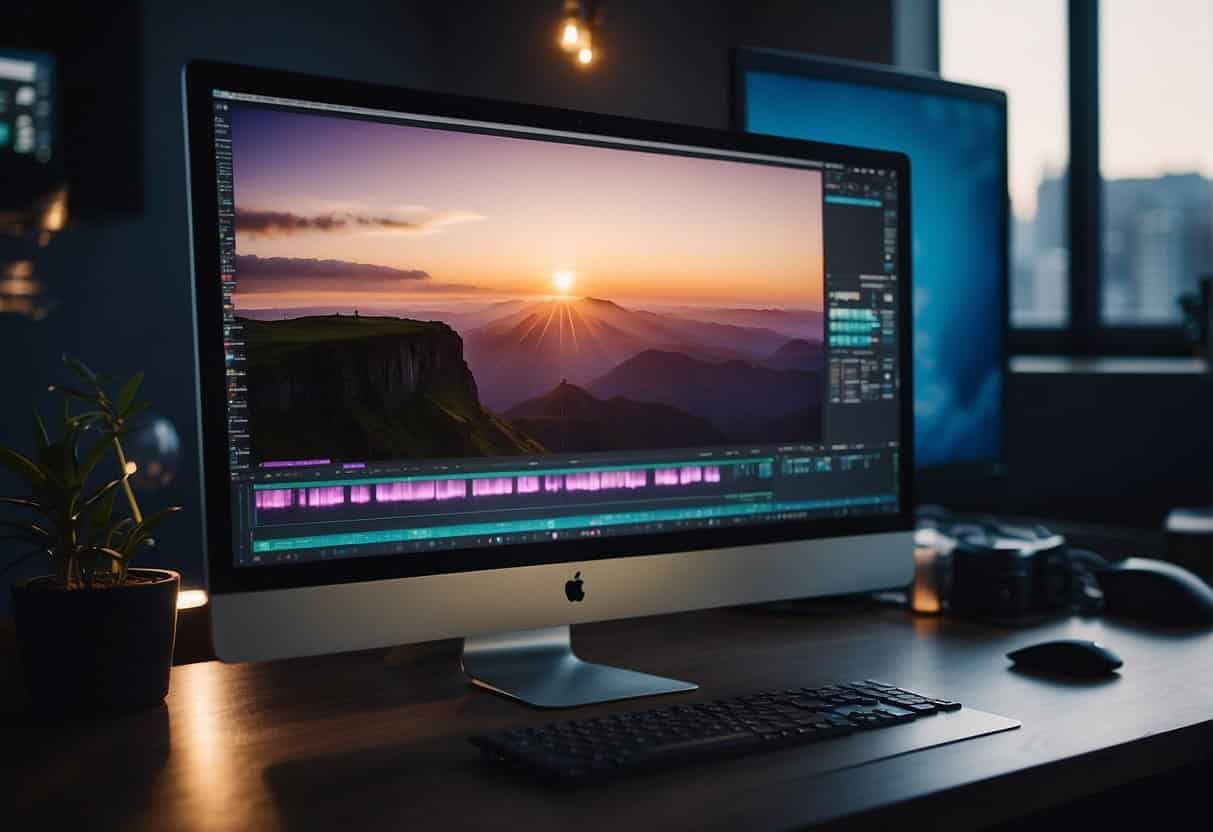
Enhancing Visuals with Color Correction and Grading
Colour correction and colour grading are pivotal in maximising the visual appeal and narrative power of high-resolution footage. These techniques not only enhance your video’s aesthetic but unlock its creative potential, ensuring that every frame aligns with your project’s vision.
Working with the Lumetri Color Panel
The Lumetri Color Panel is an integrated toolset in Adobe Premiere Pro that acts as a command centre for all colour correction tasks. To begin, import your clips and navigate to the Lumetri Color Panel. Here, you can adjust the white balance to ensure that colours are true-to-life, setting a neutral base for further enhancement. Utilise the panel’s basic correction sliders to modify exposure, contrast, and saturation. These adjustments can make visuals pop without compromising on naturalism. Precision tools like the tone curve and colour wheels offer fine control, empowering you to tweak the shadows, midtones, and highlights to achieve a balanced look.
Corrective Steps:
- Set white balance.
- Adjust exposure and contrast.
- Fine-tune with tone curve and colour wheels.
Applying Creative Colour Grading Techniques
Colour grading goes beyond correction; it’s an artistic choice that contributes to the story you want to tell with your footage. By using the Lumetri Color Panel, apply creative LUTs (Look-Up Tables) to instil a specific mood or style. Explore the selective colour grading tools, such as the HSL secondary tab, to stylise your video by emphasising or muting specific colours. This technique can create a visual language that supports your narrative or brand’s identity.
For impactful storytelling, the colour grading phase is where you experiment with colours to evoke emotions or signify different time periods, locations, or characters’ psychological states. As ProfileTree’s Digital Strategist, Stephen McClelland emphasises, “Appropriate colour grading can seamlessly convey your video’s tone and deepen the viewer’s connection to the content.”
Creative Techniques:
- Implement LUTs for style.
- Emphasise colours using HSL secondaries.
By fully understanding and skilfully applying the principles of colour correction and colour grading, you enhance not only the quality but also the storytelling power of your video projects.
Using Adjustment Layers to Simplify Edits
Adjustment layers are powerful tools in Premiere Pro that streamline the post-production process by allowing you to apply effects and colour corrections to multiple clips at once.
Creating Consistent Look Across Clips
When editing a sequence in Premiere Pro, maintaining a uniform look across various clips is crucial. To achieve this, one can utilise adjustment layers. These layers act like clear sheets placed over the clips on the timeline, enabling you to apply colour correction or visual effects in a non-destructive manner. This means that the underlying footage remains untouched, which is beneficial for making consistent or iterative changes.
Here’s a quick step-by-step guide:
- Right-click in the Project Panel and select New Item > Adjustment Layer.
- Drag the adjustment layer onto a track above your clips in the timeline.
- Apply your desired effect(s) to the adjustment layer.
By doing so, every clip under the adjustment layer on the timeline will inherit the adjustments applied, providing a swift method to ensure a cohesive visual style.
Managing Effects and Presets
Adjustment layers can also simplify managing effects and presets. Whether you’re a novice or seasoned editor, having to apply the same effect to multiple individual clips repeatedly can be a time sink and can lead to inconsistencies.
Consider the following approach to manage effects efficiently:
- Apply effects or combinations of effects to an adjustment layer.
- Adjust the parameters of the effects on the adjustment layer, which will affect all underlying clips.
- Save these combinations as presets for future use to maintain consistency and efficiency.
This process not only saves time but can also lead to a more polished and professional final product. Our expert, Stephen McClelland, asserts, “Mastering the use of adjustment layers is fundamental for creating sophisticated visual narratives, especially when working with a limited budget.”
Through the strategic use of adjustment layers, you will find that handling visual effects and colour correction becomes a more manageable and less error-prone aspect of video editing.
Rendering and Exporting for Different Platforms
When it comes to video editing, the final step of rendering and exporting is crucial because it affects the quality and compatibility of your video across different platforms. We’ll guide you through working with Adobe Media Encoder and tailoring your videos for various social media platforms to ensure your content looks its best wherever it is viewed.
Working with Adobe Media Encoder
Adobe Media Encoder is an indispensable tool for video editors using Adobe Premiere Pro. It functions as a powerful encoding engine that allows us to export videos to the desired playback resolutions and formats. This is important because using Adobe Media Encoder streamlines our workflow by batch processing multiple videos and ensuring consistent quality across all our exports.
- Batch Processing: Queue your Premiere Pro sequences in the Media Encoder, saving time.
- Background Rendering: This allows us to continue editing while Media Encoder does its work.
- Format Variety: It supports virtually every media format under the sun, making it your one-stop-shop for exporting needs.
The practical steps to use Adobe Media Encoder are as follows:
- Open Adobe Premiere Pro and select your project.
- Go to ‘File > Export > Media’, which will open the export settings window.
- Choose ‘Queue’, and your sequence will transfer to Adobe Media Encoder.
- In Adobe Media Encoder, fine-tune the settings for your desired output.
By making the most of Adobe Media Encoder, we ensure our videos are not only high quality but also optimised for any platform we choose.
Setting Resolution and Formats for Social Media
When exporting videos for social media, we must pay close attention to the resolution and format to align with platform specifications. For instance, YouTube recommends specific settings for optimal playback quality. Utilising presets in Adobe Premiere Pro can be a useful starting point. Remember, different platforms have different requirements:
- YouTube: Full HD (1,920 x 1,080) or 4K (3,840 x 2,160) resolution is preferred. A high bit rate and the format should be .mp4 with H.264 encoding.
- Facebook: Supports a range of resolutions, but 1,280 x 720 is a safe bet. The optimal length is 240 minutes or less, and the maximum frame rate is 30fps.
- Instagram: Ideal resolution for feed posts is 1,080 x 1,080, while IGTV prefers videos with a resolution of 1,080 x 1,920.
For a streamlined workflow, ensure that your video settings are as follows:
- Resolution: Match or exceed social media platform recommendations.
- Format: Generally, MP4 with H.264 codec works well across all platforms.
- Aspect Ratio: Tailor this to the platform (16:9 for YouTube, 1:1 for Instagram feed, 9:16 for Instagram Stories and IGTV).
Exporting is not just about hitting ‘Export’ and hoping for the best. It requires an understanding of where the content will land and ensuring that the video’s specifications line up with what’s expected on each social media platform. By doing so, we guarantee seamless playback and a professional look for our audience, regardless of where they consume our content.
Extending Your Skills with Advanced Techniques
To remain competitive and effective in video editing, consistently enhancing your skills is essential. Advanced techniques in Adobe Premiere Pro can elevate your projects and streamline your workflow. By engaging with in-depth tutorials and up-to-date resources, you can transform your basic editing knowledge into expert proficiency.
Learning Through Tutorials and How-tos
An abundance of online tutorials tailored for various skill levels can help us refine our video editing prowess. One valuable resource is the advanced video editing techniques that walk us through complex features. These tutorials may include mastering the art of colour correction, audio enhancement, and creating snappy 2D animations. By following step-by-step how-tos, we ensure not just theoretical understanding but also practical application of advanced post-production methods.
Staying Updated with Premiere Pro Tutorials from Creative Bloq
Creative Bloq is well-regarded for providing comprehensive tutorials and staying abreast with the latest design news, including updates on Premiere Pro tools and features. Subscribing to the Creative Bloq newsletter offers us timely insights and access to cutting-edge tutorials curated by industry professionals. This helps us to not only keep our skills updated in line with current trends but also to incorporate innovative techniques into our budget-conscious workflows.
Premiere Pro Tips: Frequently Asked Questions
In video editing, every technique and skill counts, especially when working within a budget. Our responses aim to provide you with practical and efficient ways to enhance your video editing on Adobe Premiere Pro without stretching your finances.
What are the top budget-friendly techniques for improving video editing in Premiere Pro?
Adjusting playback resolution can significantly improve editing performance, especially when dealing with high-resolution footage. This technique allows for smoother playback and a more responsive editing experience without incurring additional costs. For further insights and techniques, consider the suggestions from 27 Essential Adobe Premiere Pro Tips for Beginners.
Can you achieve professional-level editing with Premiere Pro on a tight budget?
Yes, professional-level editing is attainable on a budget. Mastery of Premiere Pro’s built-in features, alongside a resourceful approach to utilising free plugins and tools, can lead to high-quality results. It’s all about creativity, skill, and an efficient workflow.
What essential skills should a beginner focus on to become proficient in Premiere Pro?
Beginners should prioritise learning the basics of the timeline, understanding how to cut and arrange clips, applying simple transitions, and getting familiar with keyframe animation. These core skills form the foundation for more advanced techniques in video editing.
Are there any free resources available to enhance video editing skills in Premiere Pro?
Numerous free tutorials, blogs, and forums are available to help improve editing skills. A fantastic starting point is Premiere Pro: Master Editing with Tips & Tutorials – Mixkit, offering valuable tips and step-by-step guides.
How difficult is it to learn video editing in Premiere Pro for newcomers?
While there’s a learning curve, newcomers can become proficient in Premiere Pro by dedicating time to learn and practise. Starting with basic editing tasks and progressively moving to more complex projects is an effective approach to learning.
Which affordable tools or plugins complement Premiere Pro for cost-effective video editing?
There are several affordable or even free tools and plugins that can supplement Premiere Pro’s capabilities, such as the Transform effect for motion blur and custom animations. These can add a professional touch to projects without significant expense.