How to Build a WordPress Website Without a Domain
Table of Contents
Buying a domain is one of the first costs people hit when they start a website, and plenty of business owners want to know if they can skip it, at least to begin with. The short answer is yes. WordPress lets you build and test a site before you commit a penny to a web address.
This guide walks through the methods that actually work, the trade-offs that come with each one, and the point at which paying for a domain stops being optional. If you are weighing up whether to go the free route or invest properly from day one, you will have a clear answer by the end.
Building a WordPress Website Without a Domain
You do not need a domain to start building in WordPress. A free subdomain or a local install gives you a working site you can design, fill with content, and test before anything goes public. The catch is that a site without its own domain stays semi-private and is hard to grow into a real business presence.
Why do people build without a domain first
Two reasons come up again and again. The first is cost: a free build lets you try WordPress without paying for a domain or a hosting plan. The second is naming. If you are still deciding what to call the business, building first gives you breathing room to settle on a name before you register it.
There is a trade-off worth saying plainly. With no domain, your site has no professional email address and no memorable web address. That is fine for testing and learning. It is a problem the moment you want customers to find you.
The methods that work
A few practical routes let you build without buying a domain:
- Use a free WordPress.com plan, which gives you a subdomain such as yoursite.wordpress.com at no cost.
- Install WordPress on a local development environment so the site lives on your own computer while you build it.
- Use a hosting staging URL, where the host provides a temporary web address for development work.
- Register a domain early but delay building, which secures the name for later without committing to design work now.
If you would rather have the technical setup handled from the start, ProfileTree offers WordPress hosting management and website development for businesses across Northern Ireland, Ireland, and the UK.
How to set up a free WordPress site step by step
- Open WordPress.com in your browser.
- Select the option to start a new website.
- Create an account by entering your details.
- Check your email and click the activation link WordPress sends you.
- Log in and open your new site’s dashboard.
- Choose a free theme to set the look of the site.
- Add pages and posts using the editor in the dashboard.
Comparing Free WordPress and Website Builder Options
There is no single best platform for building without a domain. The right choice depends on how technical you are, whether you plan to go live later, and how much control you want over the finished site. The table below sets out the main categories side by side.
| Option | Strengths | Limits |
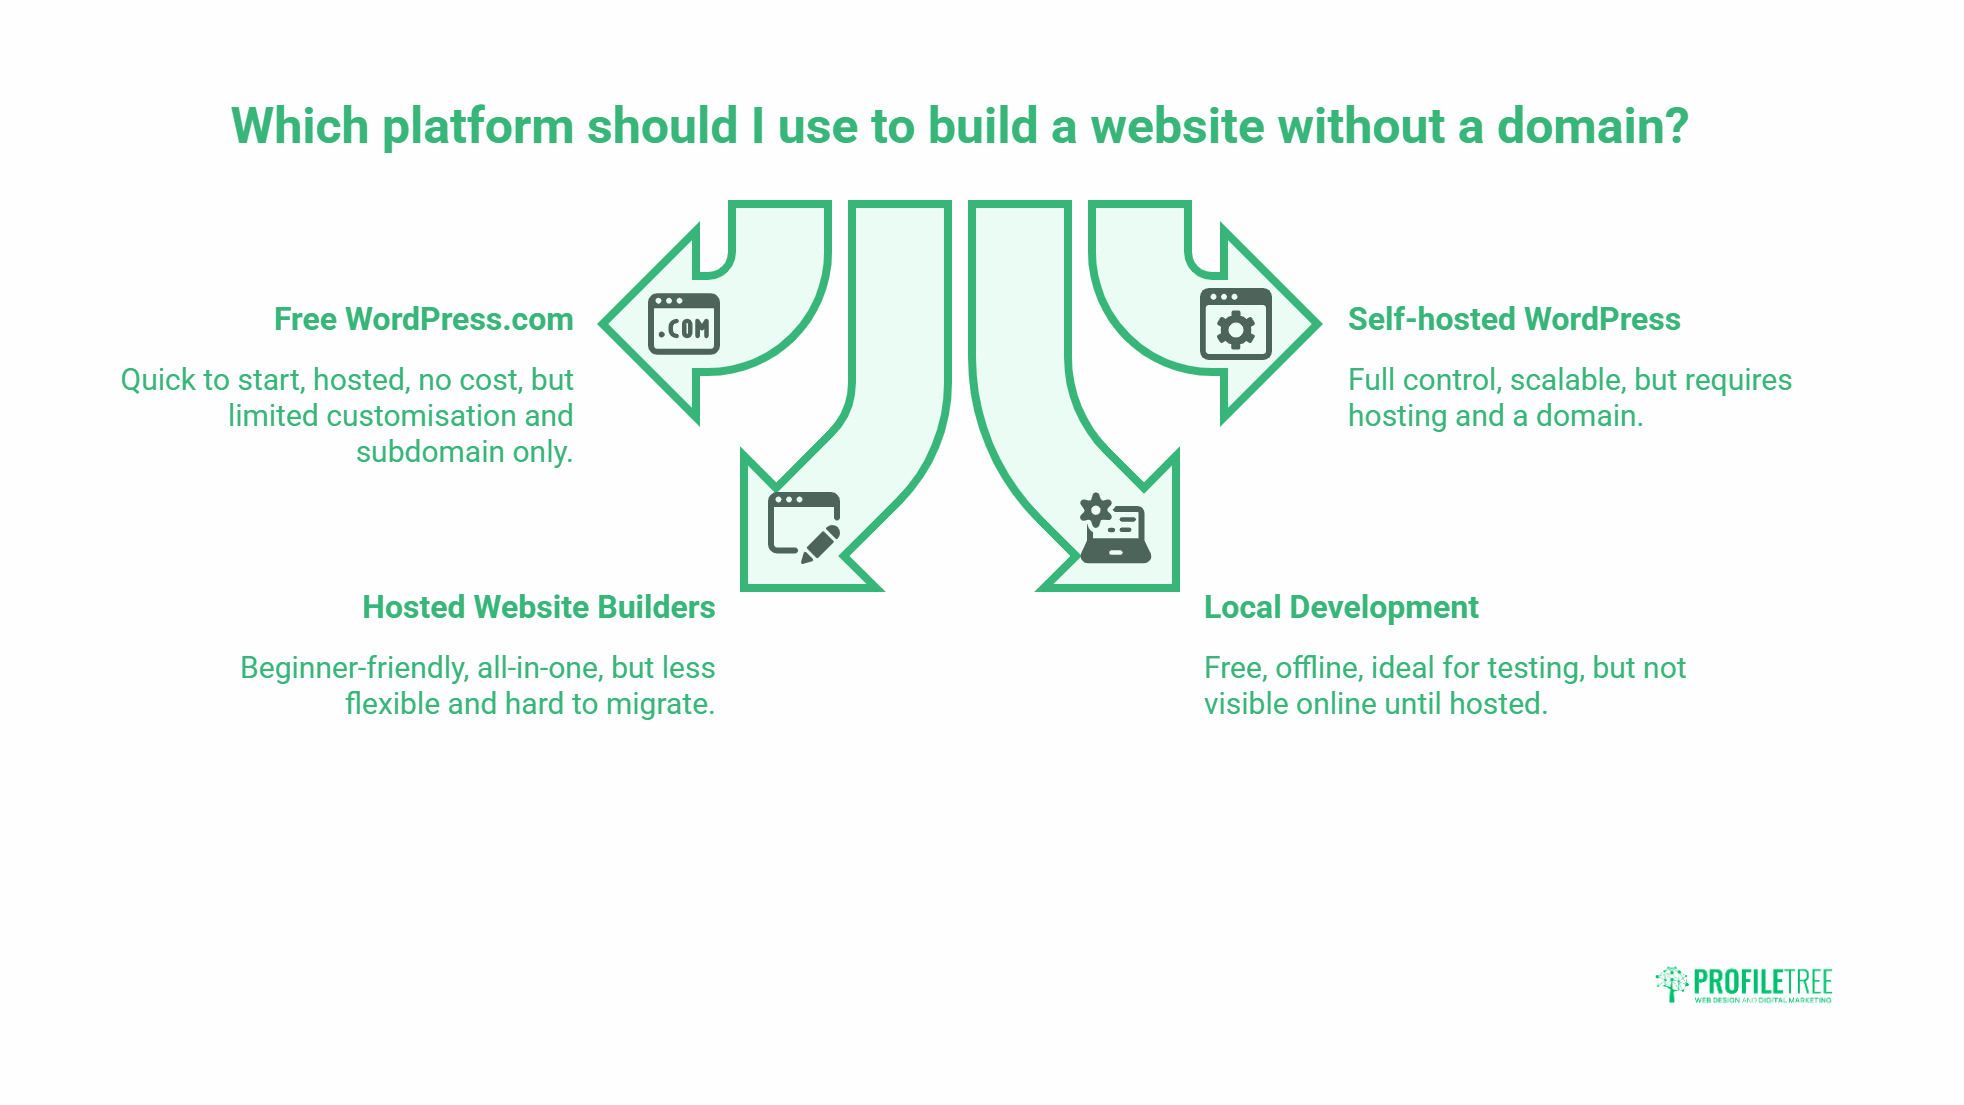
| Free WordPress.com plan | No cost, quick to start, hosted for you, no setup | Subdomain only, limited customisation, platform rules apply |
| Self-hosted WordPress (WordPress.org) | Full control, all themes and plugins, scalable | Needs hosting and a domain before it works publicly |
| Hosted website builders | Drag-and-drop, beginner-friendly, all-in-one | Less flexibility, harder to migrate away later |
| Local development install | Free, offline, ideal for testing and learning | Not visible online until hosted, more technical |
Free hosted WordPress
A free WordPress.com plan is the fastest way in. It bundles hosting and the builder together, so you can sign up and start adding content within minutes. The trade-off is control: you get a subdomain, a limited set of customisation options, and the platform’s own rules about what you can publish and how you can earn from it.
Self-hosted WordPress
WordPress.org software is free to download, but a fully working public site needs both hosting and a domain. This is the route most businesses end up on because it gives complete control over design, plugins, and functionality. You can build locally first, then move the site to hosting once you have a domain ready.
Hosted website builders
Builder platforms package the content management system, design tools, and hosting into one product. They are simple to use and good for getting something on screen quickly. The downside is that you trade flexibility for convenience, and moving your site elsewhere later can be awkward.
For a build you intend to grow, a properly planned website design project usually serves a business better than a template you outgrow within a year.
Local development
Installing WordPress on your own machine lets you build and test offline at no cost. It suits developers and anyone who wants to experiment without anything going public. The site stays invisible to the outside world until you move it onto live hosting, so it is a staging step rather than a launch.
How ProfileTree Helps With the Move From Free to Live
Most free builds reach a point where the limits start to cost more than a domain ever would. That is the moment a business owner usually wants help, and it is the work ProfileTree handles every week for clients across Northern Ireland, Ireland, and the UK.
Planning the build before you commit
A free site is a fine place to test ideas, but a site meant to win customers needs structure from the start. ProfileTree’s website design and website development teams plan the layout, content, and functionality around what the business actually needs, so you build once rather than rebuild later.
Hosting and the technical move
Moving a site off a free subdomain onto its own domain involves hosting, DNS, security, and migrating content without breaking links. ProfileTree’s hosting management covers the setup and the ongoing upkeep, so updates, backups, and security are handled rather than left to chance.
Getting found once you are live
A custom domain is the start, not the finish. Being found takes search engine optimisation and a clear digital strategy that turns visitors into enquiries. For teams who would rather build the skills in-house, ProfileTree also runs digital training.
The Limits of Running a Site With No Domain
A site without its own domain comes with real constraints, and most of them affect how you grow and earn. Knowing these upfront saves you from building something you have to rebuild later.
- Earnings from the site are restricted. Free plans limit advertising and selling, so monetisation is difficult.
- Customisation is capped. Free hosted plans hold back many themes, plugins, and design controls.
- Branding suffers. A subdomain looks less credible than a custom web address, which matters for a business.
- Accounts can be suspended. Break the platform’s rules, and the site can be taken down.
- Security depends on the platform. You have less control over how the site is protected.
- Email is generic. There is no custom address, such as you@yourbusiness.com.
Once a site is earning its keep, the quality of its search engine optimisation and overall digital strategy matters far more than whether it started free. A subdomain caps both.
“A free build is a fine sandbox for learning WordPress, but I tell business owners not to mistake it for a foundation. The day you want customers to take you seriously is the day you need your own domain. Build on free if you must, just plan the move before you have content and links you cannot afford to lose.”
Ciaran Connolly, founder of ProfileTree, a Belfast-based web design and digital marketing agency.
When to Buy a Domain for Your WordPress Website

Buy a domain the moment your site needs to be found, trusted, or sold from. Building without one is fine for testing; running a business on one is not. A handful of clear signals tell you the time has come.
Credibility and branding
A custom domain makes a far stronger first impression than a subdomain. It signals that the business is real and established, and it lets your web address match your brand. For anything customer-facing, this alone is usually reason enough.
Custom email and professionalism
A domain unlocks a professional email address such as you@yourbusiness.com, which reads far better than a free generic account when you are dealing with customers and suppliers.
Search visibility and growth
A clear, memorable domain supports your search rankings and is easier for visitors to remember and share. As traffic and content grow, your own domain and hosting make it far simpler to scale, add an online shop, or build a membership area.
If reaching the right audience is the goal, pairing a proper domain with focused digital marketing and content marketing gives a site somewhere to grow into.
Control and ownership
On a free subdomain, you are at the mercy of the provider, who can show ads on your site or change the terms. Owning your domain gives you control over your presence and frees you from forced advertising and content restrictions.
One practical tip: register your domain early, even if you build later. Domain names are unique, so once a name is taken you must pick another or pay to buy it from the current owner.
Teams that want to build these skills in-house can also look at ProfileTree’s digital training.
Getting started the right way
Building a WordPress website without a domain is a sensible way to learn the platform, test a design, or hold off on naming until you are sure. Free hosted plans and local installs let you create and customise a full site at no cost, with the understanding that a subdomain will always cap how far you can take it.
Treat the free build as a starting line, not a destination. The day you want customers to find you, register a domain, move to proper hosting, and give the site room to grow. Start experimenting today, and plan the move before you have content worth protecting.
Frequently Asked Questions
Can I create a WordPress website without a domain?
Yes. You can build a WordPress site without buying a domain by using a free WordPress.com subdomain or a local install. The site works for development and personal use, but it will not have a simple, memorable public web address. For a professional presence, you will want to register a domain before going live.
How do I get a domain for my WordPress website?
Register one through a domain registrar or a web hosting provider. You search for an available name, pay an annual fee, and connect it to your hosting. Registering early is wise because once a name is taken, you must choose another or buy it from the current owner.
Do I need coding skills to build a WordPress website?
No. WordPress uses templates and visual tools that let you build and customise a site without writing code. Themes set the design, and plugins add features, so most people can put together a working site without any technical background.
Can I change the design of my WordPress website later?
Yes. You can switch themes or customise an existing one at any time. Changing the design does not delete your content, so you can refresh the look of the site as your business grows without starting over.
Can I add extra features to my WordPress website?
Yes. Plugins extend what a WordPress site can do, adding contact forms, online shops, booking systems, and social media integration. Free hosted plans limit which plugins you can install, while a self-hosted site gives you access to the full range.