How to Create a WordPress Website: Complete Beginner’s Guide
Table of Contents
Starting your own website can be daunting, especially if you’re unfamiliar with web development. The good news? WordPress powers over 40% of all websites globally, and it’s specifically designed to be accessible for people at all skill levels. Whether you’re launching a business site, a portfolio, or a blog, this guide walks you through every step of creating a professional WordPress website without needing to write a single line of code.
At ProfileTree, we’ve helped hundreds of businesses across Northern Ireland, Ireland, and the UK build effective WordPress sites. Drawing on years of experience in web design and development, we’ll show you exactly how to get your site live—and avoid the common mistakes that trip up beginners.
Choosing Web Hosting and a Domain Name
Before you can build anything, you need two fundamental components: somewhere to host your website and a web address that people can type into their browsers. Think of web hosting as renting space on the internet where your website files reside, while your domain name serves as your unique address.
Why Reliable Web Hosting Matters
Your web host has a direct impact on your website’s performance, security, and availability. A quality hosting provider keeps your site accessible 24/7, protects it from security threats, and provides the speed your visitors expect. For beginners, shared web hosting offers an affordable entry point—you share server resources with other websites, keeping costs manageable whilst still getting solid performance.
Poor hosting choices lead to slow loading times, frequent downtime, and security vulnerabilities. These issues frustrate visitors and damage your search engine rankings. Google explicitly considers site speed as a ranking factor, so your hosting choice directly impacts your ability to attract organic traffic.
When evaluating hosting providers, look for:
- Uptime guarantees: Aim for 99.9% or higher
- UK-based servers: Faster loading times for British and Irish audiences
- Automatic backups: Protection against data loss
- SSL certificates: Essential for security and SEO
- WordPress-specific features: One-click installation, automatic updates
- Responsive support: Available when you need help
Selecting Your Domain Name
Your domain name is your digital identity. It’s how customers find you, remember you, and share your business with others. Here’s how to choose one that serves your business well:
- Keep it short and memorable. Longer domain names increase the chance of typos and make it harder for people to recall your address. Aim for 15 characters or fewer when possible.
- Make it relevant to your business. Your domain should give visitors an immediate sense of what you do. If you run a bakery in Belfast, something like “belfastartisanbread.com” tells people exactly what to expect.
- Avoid hyphens and unusual spellings. These create confusion when people try to find you. If you verbally share your website with someone, they should be able to type it correctly on the first attempt.
- Choose the correct extension. Whilst .com remains the most recognised, .co.uk works perfectly for UK-focused businesses. You might also consider .ie for Irish companies or industry-specific extensions, such as .design or .agency.
- Check trademark conflicts. Before committing to a name, search the UK Intellectual Property Office database to confirm you’re not infringing on existing trademarks.
- Act quickly on good names. High-quality domain names are snapped up quickly. When you find one that fits your brand, register it promptly.
Most hosting providers include a free domain for the first year when you purchase a hosting package. This bundling simplifies the setup process and reduces your initial costs.
Installing WordPress Platform
Once you’ve secured hosting and a domain name, the next step is to install and run WordPress. Modern hosting providers have simplified this process dramatically—what once required technical knowledge now takes just a few clicks.
Understanding WordPress.org vs WordPress.com
Before installation, it is essential to understand the distinction between WordPress.org and WordPress.com. WordPress.org provides the free, open-source software you install on your own hosting. This gives you complete control, unlimited customisation options, and the ability to monetise your site however you choose.
WordPress.com is a hosted service where WordPress manages the technical infrastructure. Whilst convenient, it limits your control, restricts plugin usage, and requires paid plans for basic features like custom domain names.
For business websites, WordPress.org (self-hosted) is almost always the right choice. You maintain ownership, flexibility, and the ability to scale as your business grows.
Step-by-Step WordPress Installation
Most hosting providers offer automatic WordPress installation through tools like Softaculous or built-in installers. Here’s the typical process:
- Log in to your hosting control panel. After purchasing hosting, you’ll receive login credentials for your hosting account’s dashboard (often cPanel or a custom interface).
- Locate the WordPress installer. Look for “WordPress” under a section labelled “Website” or “Scripts”. Some hosts have custom WordPress installation wizards on their main dashboard.
- Select your domain. Choose which domain you want to install WordPress on. If you have multiple domains on your account, select the correct one from the dropdown menu.
- Configure basic settings. You’ll need to provide:
- Site name (you can change this later)
- Admin username (avoid “admin” for security reasons)
- Admin password (use a strong, unique password)
- Admin email address
- Complete the installation. Click the install button and wait a few minutes while WordPress is configured. The installer creates your database, uploads files, and prepares your site.
- Access your dashboard. Once complete, you’ll receive confirmation with login details. Access your WordPress dashboard by visiting yourwebsite.com/wp-admin
If your host doesn’t offer automatic installation, manual installation is straightforward. Download WordPress from WordPress.org, upload the files via FTP, create a MySQL database, and run the famous five-minute installation script. Most beginners won’t need this approach, but it’s helpful to know the option exists.
Initial Security Configuration
Immediately after installation, take these security steps:
- Change the default admin username if you used “admin”. Create a new administrator account with a different username, then delete the original admin account.
- Install a security plugin. Options like Wordfence or Solid Security add crucial protection against common attacks.
- Set up automatic backups. Plugins like UpdraftPlus can automatically back up your site to cloud storage.
- Update everything. Check for WordPress core updates, theme updates, and plugin updates. Install them all.
These steps take 15 minutes but prevent 90% of common WordPress security issues.
Finding and Installing a WordPress Theme
Your theme controls your website’s visual appearance and layout structure. With over 11,000 free themes available in the WordPress directory, plus thousands more premium options, choosing the right one requires clarity about your goals and audience needs.
Understanding Theme Selection
A theme isn’t just about aesthetics. It determines your site’s speed, mobile responsiveness, accessibility features, and how easily you can customise the design. Making the wrong choice creates technical debt that becomes expensive to fix later.
Many agencies default to page builders like Elementor or Divi because they allow quick visual design. However, these tools generate excessive code that can slow down your site. At ProfileTree, we build using native WordPress blocks, which produce clean, fast-loading websites that you can actually manage without ongoing developer assistance.
When evaluating themes, prioritise:
- Loading speed. Test theme demos with Google PageSpeed Insights. Look for scores above 90 on mobile. Slow themes hurt your SEO rankings and conversion rates.
- Mobile responsiveness. Over 60% of web traffic comes from mobile devices. Your theme must work flawlessly on phones, tablets, and desktops.
- Regular updates. Active theme developers release updates to fix bugs, patch security issues, and maintain compatibility with the latest WordPress version. Check when the theme was last updated—anything older than six months raises concerns.
- Support quality. Read reviews focusing on support responsiveness. When you encounter issues, you need help quickly.
- Built-in accessibility. Themes should adhere to WCAG guidelines, utilising semantic HTML, a proper heading hierarchy, and keyboard navigation support.
- Compatibility with standard plugins. Your theme should be compatible with popular plugins, such as WooCommerce, contact forms, and SEO tools, without any conflicts.
Types of Themes Available
Multipurpose themes work for various industries and include multiple pre-built layouts. These offer flexibility but often include features you’ll never use, adding unnecessary bloat.
Niche-specific themes target particular industries, such as restaurants, solicitors, and photographers. They include relevant features but limit your options if your business evolves.
Block themes (also known as Full Site Editing themes) represent WordPress’s modern approach. They use the block editor throughout your entire site, not just posts and pages. This creates consistency and simplifies customisation.
For businesses serious about performance, block themes built on minimal frameworks provide the best foundation. They load quickly, update easily, and give you control without complexity.
Installing Your Selected Theme
Once you’ve identified the right theme, installation takes minutes:
- Navigate to Appearance > Themes in your WordPress dashboard
- Click “Add New Theme” at the top of the screen
- Search for your chosen theme using the search bar, or upload a premium theme by clicking “Upload Theme”
- Preview the theme by clicking “Preview” to see how it looks with your content
- Click “Install” when you’re satisfied with your choice
- Click “Activate” after installation completes
Your site now displays using the new theme. Don’t worry if it looks empty—that’s because you haven’t added content yet.
Theme Customisation Basics
Access theme customisation through Appearance > Customise in your dashboard. This opens the live customiser where you can adjust:
- Site identity: Logo, site title, tagline
- Colours: Brand colour schemes
- Typography: Font choices and sizes
- Layout options: Sidebar positions, content width
- Header and footer: Navigation menus, widget areas
- Homepage settings: What displays on your main page
Changes are previewed in real-time. Click “Publish” when you’re happy with the modifications.
“The theme you choose today affects your website for years to come,” notes Ciaran Connolly, Director at ProfileTree. “We’ve migrated dozens of businesses away from bloated page builder sites to clean, fast WordPress builds. The difference in loading speed alone often doubles their organic traffic within months.”
Customising Your WordPress Website
With WordPress installed and a theme activated, you’re ready to configure your site’s core settings and add the necessary functionality for your business. This phase transforms WordPress from a blank canvas into a tailored platform that serves your specific goals.
Essential WordPress Settings Configuration
Navigate to Settings in your WordPress dashboard to access fundamental configuration options. These settings affect your site’s functionality, SEO performance, and user experience.
General Settings
Under Settings > General, configure:
- Site Title: Your business name or website title
- Tagline: A brief description of what you do (appears in search results)
- WordPress Address (URL): Your site’s location
- Site Address (URL): Where people access your site
- Email Address: Where WordPress sends notifications
- Timezone: Set to your local timezone for accurate post scheduling
- Date Format: How dates display across your site
- Time Format: 12-hour or 24-hour format
Accurate timezone settings matter more than you might think. They affect scheduled posts, comment timestamps, and analytics tracking.
Reading Settings
Settings > Reading controls what visitors see when they land on your site:
- Homepage display: Choose between your latest posts or a static page
- Posts per page: How many blog posts appear before pagination
- Search engine visibility: Crucial setting—keep unchecked unless you’re actively working on the site and don’t want it indexed yet
Most business websites benefit from a static homepage that showcases key services, with blog posts featured on a separate page. This structure gives you control over your visitors’ first impression.
Permalink Settings
Settings > Permalinks determines your URL structure. This may seem minor, but it has a significant impact on SEO.
Choose the Post name as your permalink structure. This creates clean, readable URLs like yoursite.com/services/web-design instead of yoursite.com/?p=123. Both search engines and users prefer descriptive URLs that clearly indicate the page’s content.
Change the permalink structure before adding content. Modifying it later breaks existing links and loses the SEO value you’ve built.
Adding Plugins for Extended Functionality
Plugins add specific features to WordPress without requiring custom code. Think of them as apps for your website. The WordPress plugin repository includes over 60,000 free plugins covering virtually any functionality you can imagine.
Essential Plugins for New Sites
- SEO Plugin: Yoast SEO or Rank Math helps optimise your content for search engines. They guide you through adding meta descriptions, structuring content effectively, and configuring technical SEO.
- Security Plugin: Wordfence or Solid Security protects against brute force attacks, malware, and security vulnerabilities.
- Backup Plugin: UpdraftPlus or BackupBuddy creates automatic backups of your entire site, storing them securely off-site.
- Contact Form Plugin: WPForms or Contact Form 7 lets you create custom forms for enquiries, bookings, or feedback collection.
- Performance Plugin: WP Rocket or W3 Total Cache speeds up your site through caching and optimisation techniques.
- Analytics Plugin: MonsterInsights seamlessly integrates Google Analytics with your WordPress dashboard, displaying traffic data directly within the platform.
At ProfileTree, we work with clients to identify precisely which plugins serve their business goals. Many sites run 30+ plugins when they only need 10 or fewer. Each additional plugin adds potential security vulnerabilities and performance overhead.
Installing and Activating Plugins
- Navigate to Plugins > Add New in your dashboard
- Search for the plugin name in the search bar
- Click Install Now next to your chosen plugin
- After installation completes, click Activate
- Configure plugin settings through its dedicated menu item or under Settings
Only install plugins from reputable sources. Check reviews, active installations, and last update date. Abandoned plugins pose security risks.
Plugin Management Best Practices
- Keep plugins updated. Developers release updates to fix bugs and patch security holes. Check for updates weekly under Dashboard > Updates.
- Delete unused plugins. Deactivating isn’t enough—completely remove plugins you’re not using. They still present security risks even when inactive.
- Test before updating. Major plugin updates occasionally cause conflicts. If possible, test updates on a staging site before applying them to your live site.
- Avoid plugin bloat. Each plugin adds code that WordPress must load to function. Be selective. If a plugin only provides one minor feature that you rarely use, consider finding an alternative solution.
Importing Demo Content (Optional)
Many themes include demo content that replicates their showcase site. Importing this content provides a starting framework you can modify rather than building pages from scratch.
Demo content typically includes sample pages, posts, images, and pre-configured layouts. This accelerates your initial setup, especially if you’re unsure how to structure certain page types.
To import demo content:
- Check your theme documentation for specific import instructions
- Download the demo content file (usually provided by the theme developer)
- Navigate to Tools > Import in WordPress
- Select WordPress as the import type
- Upload the demo content file
- Choose to import attachments (images)
- Wait for the import to complete
After importing, you’ll have placeholder content to replace with your actual business information, images, and copy. This works well for beginners who benefit from seeing functional examples before creating their own pages.
Alternatively, skip demo content entirely and build pages from scratch. This approach takes longer initially, but results in a cleaner site without unnecessary pages or posts you need to delete later.
Building Your Website
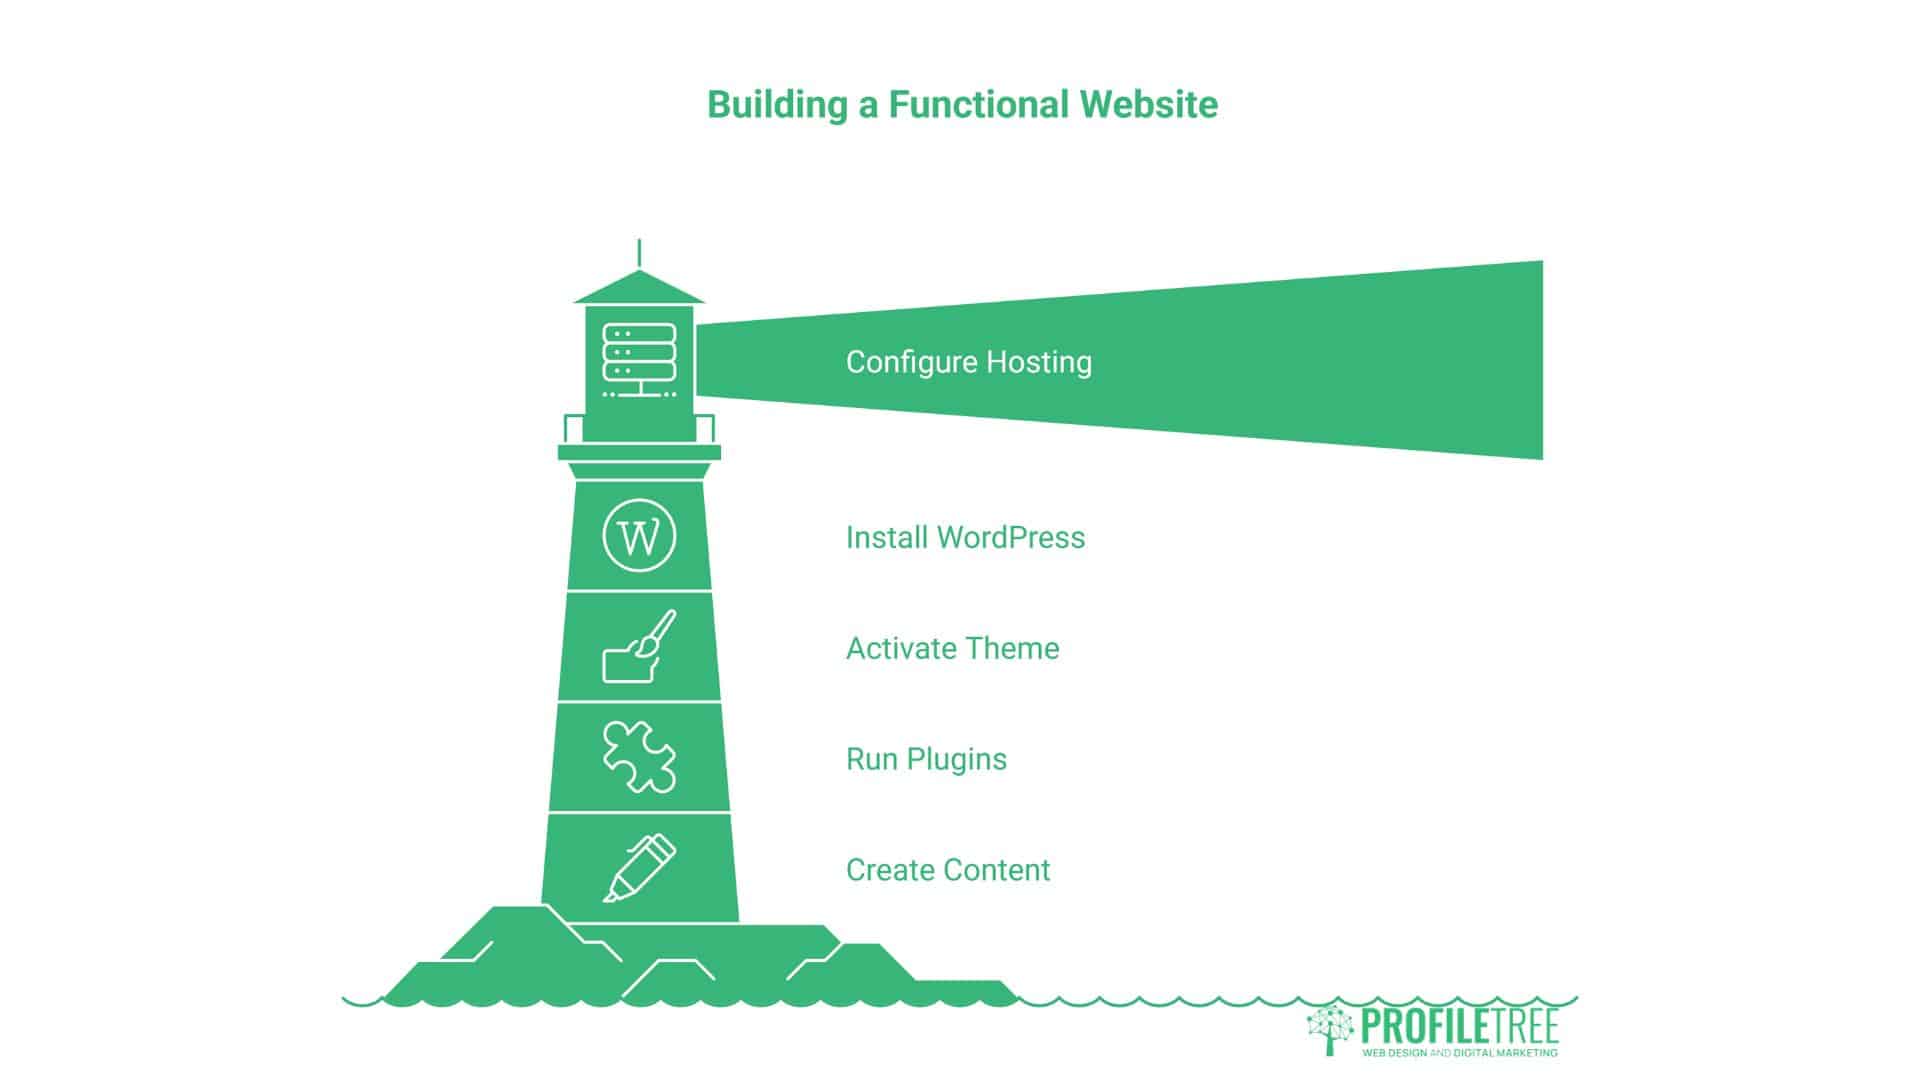
With your foundation in place—hosting configured, WordPress installed, theme activated, and essential plugins running—you’re ready to create the actual content people will see and interact with. This phase transforms your technical setup into a functional website that communicates your brand and serves your audience.
Creating Pages and Organising Content
Pages form the permanent structure of your website. Unlike blog posts that appear chronologically, pages exist outside your timeline—they’re your About page, Services page, Contact page, and so on.
Adding Your First Page
Navigate to Pages > Add New in your WordPress dashboard. You’ll see the block editor, WordPress’s modern content creation interface.
- Enter your page title in the field at the top
- Add content using blocks. Click the + icon to add different content types:
- Paragraph blocks for text
- Heading blocks for titles and subtitles
- Image blocks for visuals
- Button blocks for calls-to-action
- Column blocks for multi-column layouts
- Format your text using the toolbar that appears when you select text
- Preview your page by clicking Preview in the top right
- Publish when ready by clicking the Publish button
The block editor organises content into modular components. Each block handles one element—a paragraph, an image, a quote. This structure keeps your content organised and makes future editing straightforward.
Essential Pages Every Website Needs
Homepage: Your digital front door. This should immediately communicate what you do and who you serve. Include a clear headline, a brief explanation of your services or products, social proof (testimonials or client logos), and obvious next steps for visitors.
About Page: Tell your story. Explain your background, experience, and what makes you different. People buy from businesses they trust, and your About page builds that trust. Include photos of your team if relevant.
Services or Products Page: Detail what you offer. For service-based businesses, create individual pages for each major service provided. For product businesses, this might link to your shop or product categories.
Contact Page: Make it easy for people to get in touch with you. Include a contact form, phone number, email address, physical location if relevant, and business hours. Consider embedding a Google Map if you have a physical location.
Privacy Policy and Terms: Legal requirements for most websites, mainly if you collect any user data or use cookies. Several plugins can generate these based on your specific situation.
Content Organisation Best Practices
Structure information in short paragraphs—three to four sentences maximum. This improves readability, particularly on mobile devices where long text blocks become overwhelming.
Use heading hierarchy properly. Your page title is H1 (WordPress handles this automatically). Section headings should be H2, and sub-sections under those should be H3. Never skip heading levels.
Add images to break up text and illustrate concepts. Compress images before uploading—large image files can significantly slow down your site. Tools like TinyPNG reduce file sizes without compromising quality.
Include clear calls-to-action on every page. What should visitors do next? Make it obvious through prominent buttons or links.
Setting Up Navigation Menus
Menus help visitors navigate your site structure. A straightforward and intuitive menu enhances the user experience, keeping people engaged for longer.
Creating Your Primary Menu
- Navigate to Appearance > Menus
- Click Create a new menu if you haven’t already
- Give your menu a descriptive name (this is for your reference only—visitors won’t see it)
- Select pages from the left column and click Add to Menu
- Drag and drop menu items to reorder them
- Create dropdown submenus by dragging items slightly to the right under parent items.
- Assign your menu to a location (typically “Primary Menu” or “Header Menu”)
- Click Save Menu
Most themes include multiple menu locations, such as primary navigation, footer menu, and mobile menu. You can create different menus for different locations or use the same menu in various places.
Menu Structure Guidelines
- Keep your primary navigation focused. Five to seven top-level items work well. More than that overwhelms visitors with choices.
- Use clear, descriptive labels. “Services” works better than “What We Do.” Visitors should immediately understand where each menu item takes them.
- Put essential pages first. Most people scan left to right, so your most critical pages should appear early in your menu order.
- Consider your mobile menu separately. On small screens, complex dropdown menus can be challenging to navigate. Some themes let you create simplified mobile menus.
Writing Your First Blog Post
Blogging helps establish authority, improves SEO, and gives potential customers reasons to return to your site. Posts appear in reverse chronological order and typically focus on topics your audience cares about.
Creating a Blog Post
Navigate to Posts > Add New. The interface resembles pages, but posts include additional features such as categories and tags.
- Write a compelling title. Include relevant keywords naturally, while making it interesting enough that people want to click.
- Add your content using blocks, just like you would on pages.
- Select a featured image. This appears at the top of your post and in post listings.
- Choose categories. These help organise posts by topic
- Add tags. These are more specific keywords describing your post content
- Write an excerpt (optional). This summary appears in search results and post listings
- Schedule or publish. Publish immediately or schedule for a future date
Blog Post Best Practices
- Write for humans first, search engines second. Keywords matter, but forced, unnatural keyword stuffing makes content unreadable and hurts rather than helps SEO performance.
- Front-load important information. Put your key points early. Many readers scan the first few paragraphs to decide if the full article is worth their time.
- Use subheadings liberally. They break up text, making posts scannable. Readers often skim headings to find specific information.
- Link to related content. Internal links keep readers on your site longer and help search engines understand your site structure.
- Include a call-to-action. Every post should guide readers toward the next step—subscribing to your email list, contacting you, or reading related content.
- Publish consistently. Regular posting matters more than volume. One quality post per week beats five rushed posts per month.
At ProfileTree, we help businesses develop content strategies that support their broader marketing goals. Blog content isn’t just about driving traffic—it’s about attracting the right traffic and positioning your business as the obvious choice when readers are ready to buy.
Optimising for Search Engines
SEO isn’t optional for businesses that want online visibility. Google processes over 8.5 billion searches daily. Getting found for relevant searches drives qualified traffic without ongoing advertising costs.
On-Page SEO Fundamentals
Title tags and meta descriptions: Your SEO plugin helps craft these. The title tag appears in search results as the clickable headline. Meta descriptions appear below it, explaining what the page covers. Include your target keyword naturally in both.
URL structure: Keep URLs short and descriptive. yoursite.com/web-design-belfast Beats yoursite.com/page-id-123 for both users and search engines.
Header hierarchy: Use one H1 per page (your title), then H2S for main sections, and H3S for subsections. This structure helps search engines understand your content organisation.
Image optimisation: Add descriptive alt text to every image. This helps visually impaired users and informs search engines about the image’s content. Include your keyword in alt text when it naturally makes sense.
Content quality: Google’s algorithms have become sophisticated at identifying valuable content. Write comprehensive, accurate information that genuinely helps your audience. Thin content gets penalised.
Loading speed: Page speed has a direct impact on rankings. Compress images, minimise plugins, use caching, and choose a quality hosting provider.
Mobile responsiveness: Google uses mobile-first indexing—it judges your site primarily on mobile performance. Test your site on actual mobile devices regularly.
Local SEO for UK Businesses
If you serve specific geographic areas, local SEO becomes critical. Many searches include location terms, such as “web designer Belfast” or “solicitor Manchester.”
Claim and optimise your Google Business Profile. Add accurate business information, photos, and encourage customers to leave reviews.
Include location keywords naturally in your content. If you serve Northern Ireland, mention specific cities and regions in relevant contexts.
Create location-specific pages if you serve multiple areas. A separate page for each major service area helps you rank for geo-specific searches.
Build citations on UK business directories. Consistent business name, address, and phone number (NAP) across the web signals legitimacy to search engines.
Integration with Business Tools
Modern websites rarely exist in isolation. They integrate with CRM systems, email marketing platforms, payment processors, and analytics tools, enabling you to understand performance and effectively manage customer relationships.
Email Marketing Integration
Collect email addresses from website visitors to build your marketing list. Plugins like OptinMonster or Mailchimp for WordPress create signup forms and connect to your email service provider.
Place signup forms strategically:
- Sidebar widgets on blog posts
- Pop-ups triggered by scroll depth or exit intent
- Dedicated landing pages for lead magnets
- Footer sections site-wide
Offer value in exchange for email addresses. A helpful resource, exclusive content, or special discount gives people a reason to subscribe.
Analytics and Tracking
Google Analytics shows who visits your site, where they come from, which pages they view, and how long they stay. This data reveals what’s working and what needs improvement.
Install Google Analytics using a plugin like MonsterInsights or by manually adding the tracking code to your theme. Track goal completions—contact form submissions, phone clicks, purchases—to measure actual business results, not just traffic numbers.
Payment and Booking Systems
If you sell products, WooCommerce transforms WordPress into a complete eCommerce platform. For services, booking plugins like Amelia or Bookly let customers schedule appointments directly through your site.
Payment processors like Stripe or PayPal integrate easily with WordPress. You can accept payments without customers leaving your site, reducing friction in the purchase process.
Maintaining Your WordPress Website
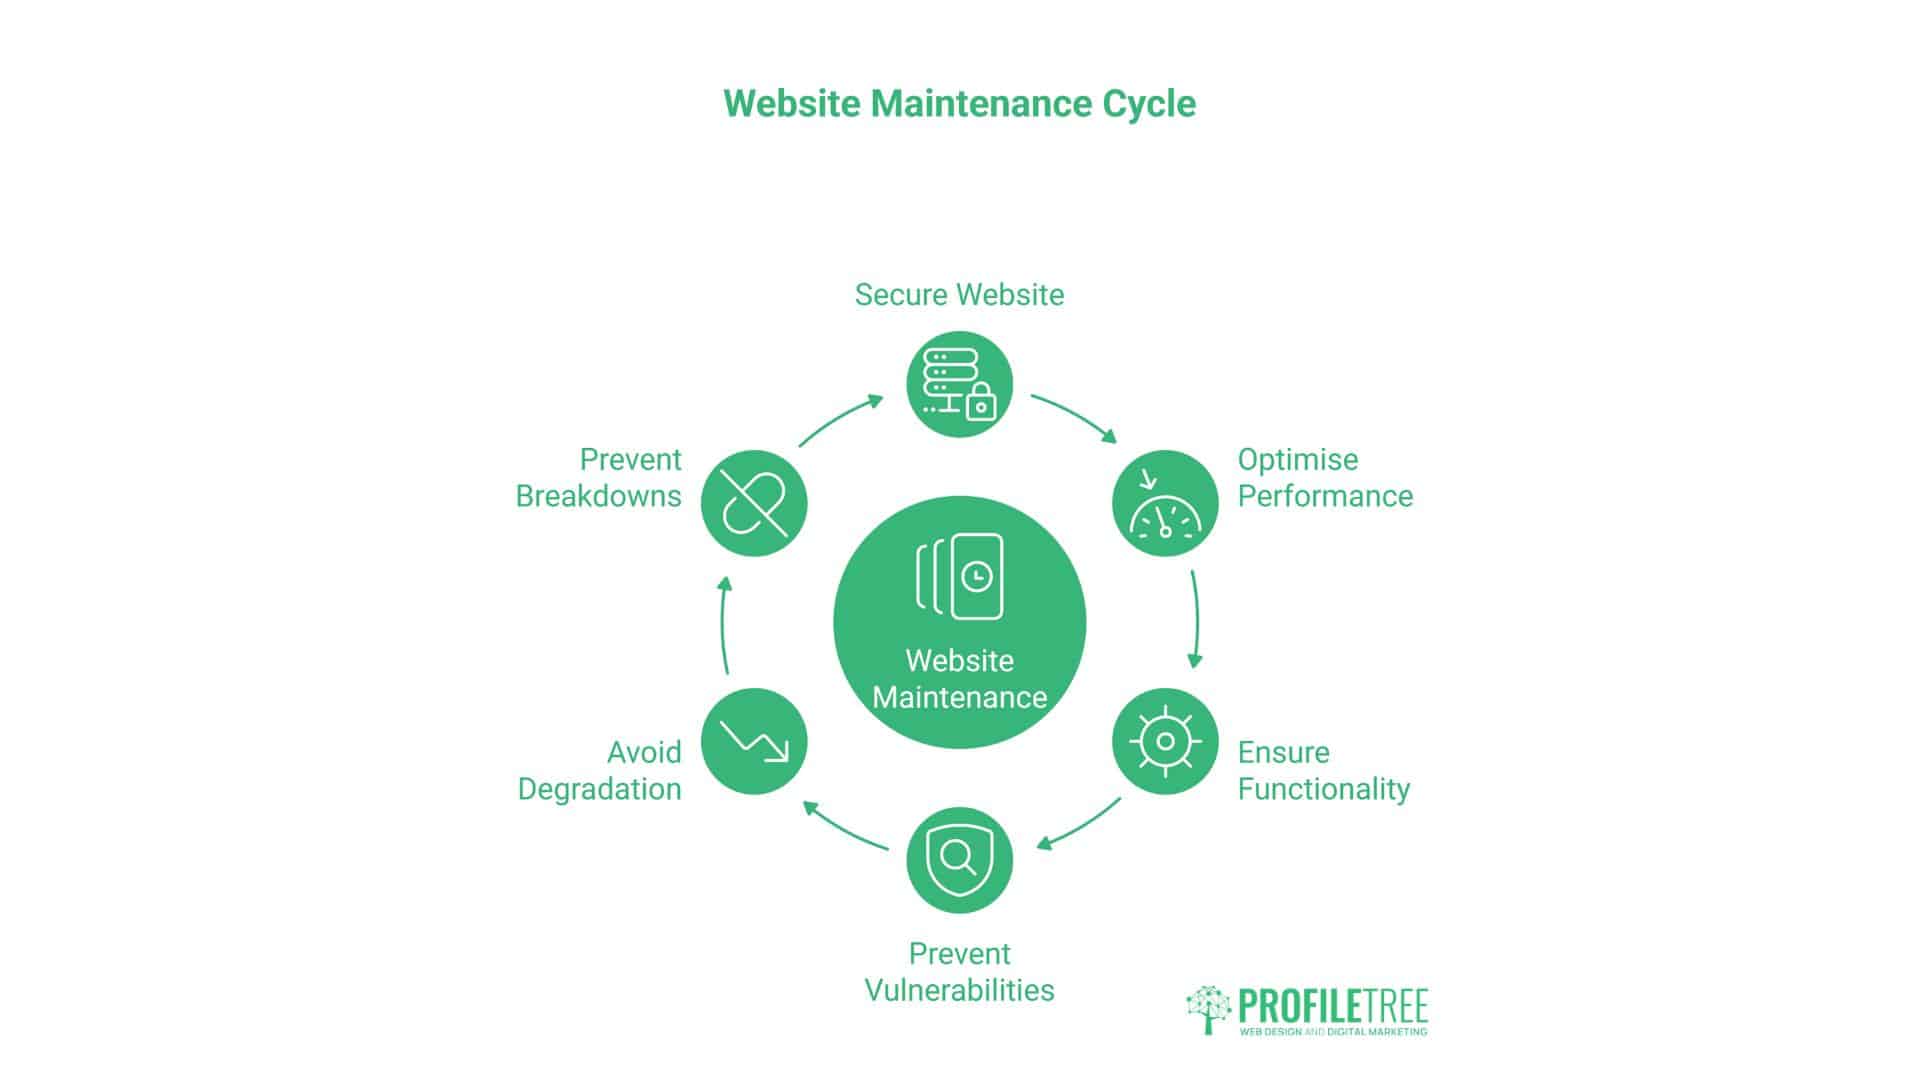
Creating your website is just the beginning. Regular maintenance keeps it secure, fast, and functional. Neglected sites become vulnerable to attacks, suffer performance degradation, and eventually break.
Essential Maintenance Tasks
- Weekly updates: Check for WordPress core, theme, and plugin updates. Install them promptly. Most updates include security patches or bug fixes.
- Regular backups: Schedule automatic daily or weekly backups. Store them off-site. When something goes wrong—and eventually something will—backups let you restore your site quickly.
- Security monitoring: Review security logs through your security plugin. Watch for failed login attempts, malware scans, and suspicious file changes.
- Performance checks: Test your site speed monthly using Google PageSpeed Insights. Identify and fix issues that slow loading times.
- Content updates: Keep your content up to date. Update outdated information, replace broken links, and refresh older posts with new data.
- Database optimisation: WordPress databases accumulate unnecessary data over time. Monthly optimisation through plugins like WP-Optimise removes bloat and improves performance.
Getting Professional Support
Many businesses start managing their own WordPress sites, but eventually need professional help. Complex customisations, performance optimisation, SEO strategy, and content marketing often benefit from expert input.
At ProfileTree, we work with businesses across various stages of their digital presence. Some need complete website builds. Others require training to manage their existing sites effectively. Many individuals require ongoing support and a strategy to expand their online presence.
“Business owners should focus on what they do best,” explains Ciaran Connolly. “WordPress gives you control over your content, but that doesn’t mean you need to become a web developer. Strategic decisions about site structure, SEO focus, and integration with business systems—those are where professional guidance creates real ROI.”
Avoiding Common Pitfalls
- Plugin overload: More plugins don’t make a better site. They increase security risks, slow loading times, and complicate troubleshooting. Be selective.
- Ignoring mobile experience: Test your site on actual mobile devices on a regular basis. Mobile traffic dominates most industries, yet many businesses optimise only for desktop viewing.
- Weak security practices: Use strong passwords, enable two-factor authentication, limit login attempts, and keep all software and operating systems up to date. Most WordPress sites get compromised through known vulnerabilities in outdated software.
- Missing analytics: You can’t improve what you don’t measure. Track your site performance, user behaviour, and conversion rates from day one.
- Inconsistent posting: Starting a blog and then abandoning it signals to visitors that your business might be inactive. It’s better to post consistently, even if it’s monthly, than sporadically, even if it’s weekly for two months, than not post at all for six.
FAQs
How much does WordPress cost?
WordPress itself is free, but you’ll need hosting (from £3 to £ 15 monthly for shared hosting) and a domain name (£8 to £ 15 annually). Premium themes cost £30-100 one-time, whilst professional development ranges from £500 to £25,000+, depending on complexity and customisation needs.
Can I build a WordPress site without coding knowledge?
Yes. Modern WordPress uses a visual block editor that requires no coding. You can create professional-looking sites by dragging and dropping content blocks. Custom functionality might require plugins or developer help, but basic sites are entirely manageable for non-technical users.
How long does it take to create a WordPress website?
A basic site takes 4-8 hours to set up correctly, including hosting configuration, theme installation, and essential page creation. More complex sites, with custom designs, extensive content, and specific functionality, may require weeks or months to develop.
Is WordPress secure?
WordPress itself is secure, but sites become vulnerable through outdated software, weak passwords, and poor security practices. Regular updates, strong authentication, quality hosting, and security plugins keep WordPress sites protected from common threats.
Taking Your Website Further
You’ve now got the complete foundation for creating a professional WordPress website. From selecting hosting to publishing your first content, each step builds toward a functional online presence that serves your business goals.
The next phase involves refinement. Monitor your analytics to understand visitor behaviour. Test different calls-to-action to improve conversion rates. Develop a content strategy that positions you as an authority in your field. Integrate business systems that streamline operations.
WordPress’s flexibility means your site can grow in tandem with your business. Start with the basics covered here, then expand functionality as your needs evolve.
At ProfileTree, we specialise in building WordPress sites that combine beautiful design with technical performance. Our focus on native WordPress development—avoiding bloated page builders—creates fast, maintainable sites that you can actually manage yourself. We also provide AI training, digital marketing strategy, video production, and comprehensive SEO services that help businesses across Northern Ireland, Ireland, and the UK grow their online presence.
Whether you’re building your first site or looking to improve an existing one, the principles remain the same: focus on your audience’s needs, maintain technical quality, and create genuine value through your content. Your website should be your hardest-working marketing asset—make sure it’s built to perform.