Search Engine Optimisation: Ranked Results for Northern Ireland SMEs
Most businesses searching for an SEO company in Belfast are not short of options. What they are short of is an agency that tells them the truth: search engine optimisation takes time, it requires sustained effort across technical, content and authority signals, and it will not deliver overnight results regardless of what anyone promises.
ProfileTree is a Belfast-based digital agency founded in 2011, and our own websites rank for thousands of keywords in Google’s top 10 through exactly the same methods we apply to client work.
Three things you need to know before choosing an SEO agency:
- Position gains in competitive markets typically take three to six months to appear and twelve months to deliver measurable commercial return.
- Technical health, content quality and backlink authority are all required; fixing only one rarely moves the needle.
- The right agency will show you their own rankings as proof of method, not just a slide deck of competitor screenshots.
If you are ready to talk about what search engine optimisation can realistically deliver for your business, our Belfast SEO team and Northern Ireland SEO specialists are available for a free consultation. If you want to understand what the service actually involves first, read on.
What ProfileTree's Search Engine Optimisation Service Includes
Search engine optimisation is not a single activity. It is a coordinated set of disciplines that work together across your website's technical foundation, its content, and its external authority signals. Below is exactly what ProfileTree's SEO service covers.
- Technical SEO Audit & Implementation
- On-Page Optimisation
- AI-Powered Content Strategy
- Link Building & Digital PR
- Local SEO for Belfast & Northern Ireland
- Monthly Reporting & Strategy Reviews
Every engagement starts with a full technical audit covering over 2,000 ranking factors. We review:
- Core Web Vitals performance,
- Page speed,
- Mobile responsiveness,
- Crawl budget efficiency,
- XML sitemap and robots.txt configuration,
- Schema markup,
- Internal link structure,
- Duplicate content, and
- Indexation errors.
We then fix what we find. The audit report is delivered before any contract is signed.
On-page search engine optimisation ensures each page clearly communicates its topic to both users and search engines. This covers:
- Intent matching between page content and target queries,
- Meta title and description optimisation,
- Heading hierarchy,
- Passage-based content structure for Google’s AI indexing,
- Image alt text, and
- Page-level internal linking.
For Northern Ireland businesses, this includes aligning content with how local customers actually phrase their searches.
Ranking for the queries your customers use requires content that genuinely answers their questions. ProfileTree builds a content calendar based on keyword gap analysis and search intent mapping. We:
- Produce new pages,
- Optimise existing ones, and
- Structure content.
Therefore, individual sections can be extracted and cited by AI search tools, including Google AI Overviews, ChatGPT, and Perplexity.
External links from credible sources remain one of the strongest ranking signals in Google’s algorithm. Our link-building approach focuses on:
- Editorial placements in UK and Irish publications,
- Sector-specific directories,
- Local business associations, and
- Digital PR outreach.
We do not use bulk link schemes or private blog networks. Authority built through genuine editorial coverage survives algorithm updates; shortcuts rarely do.

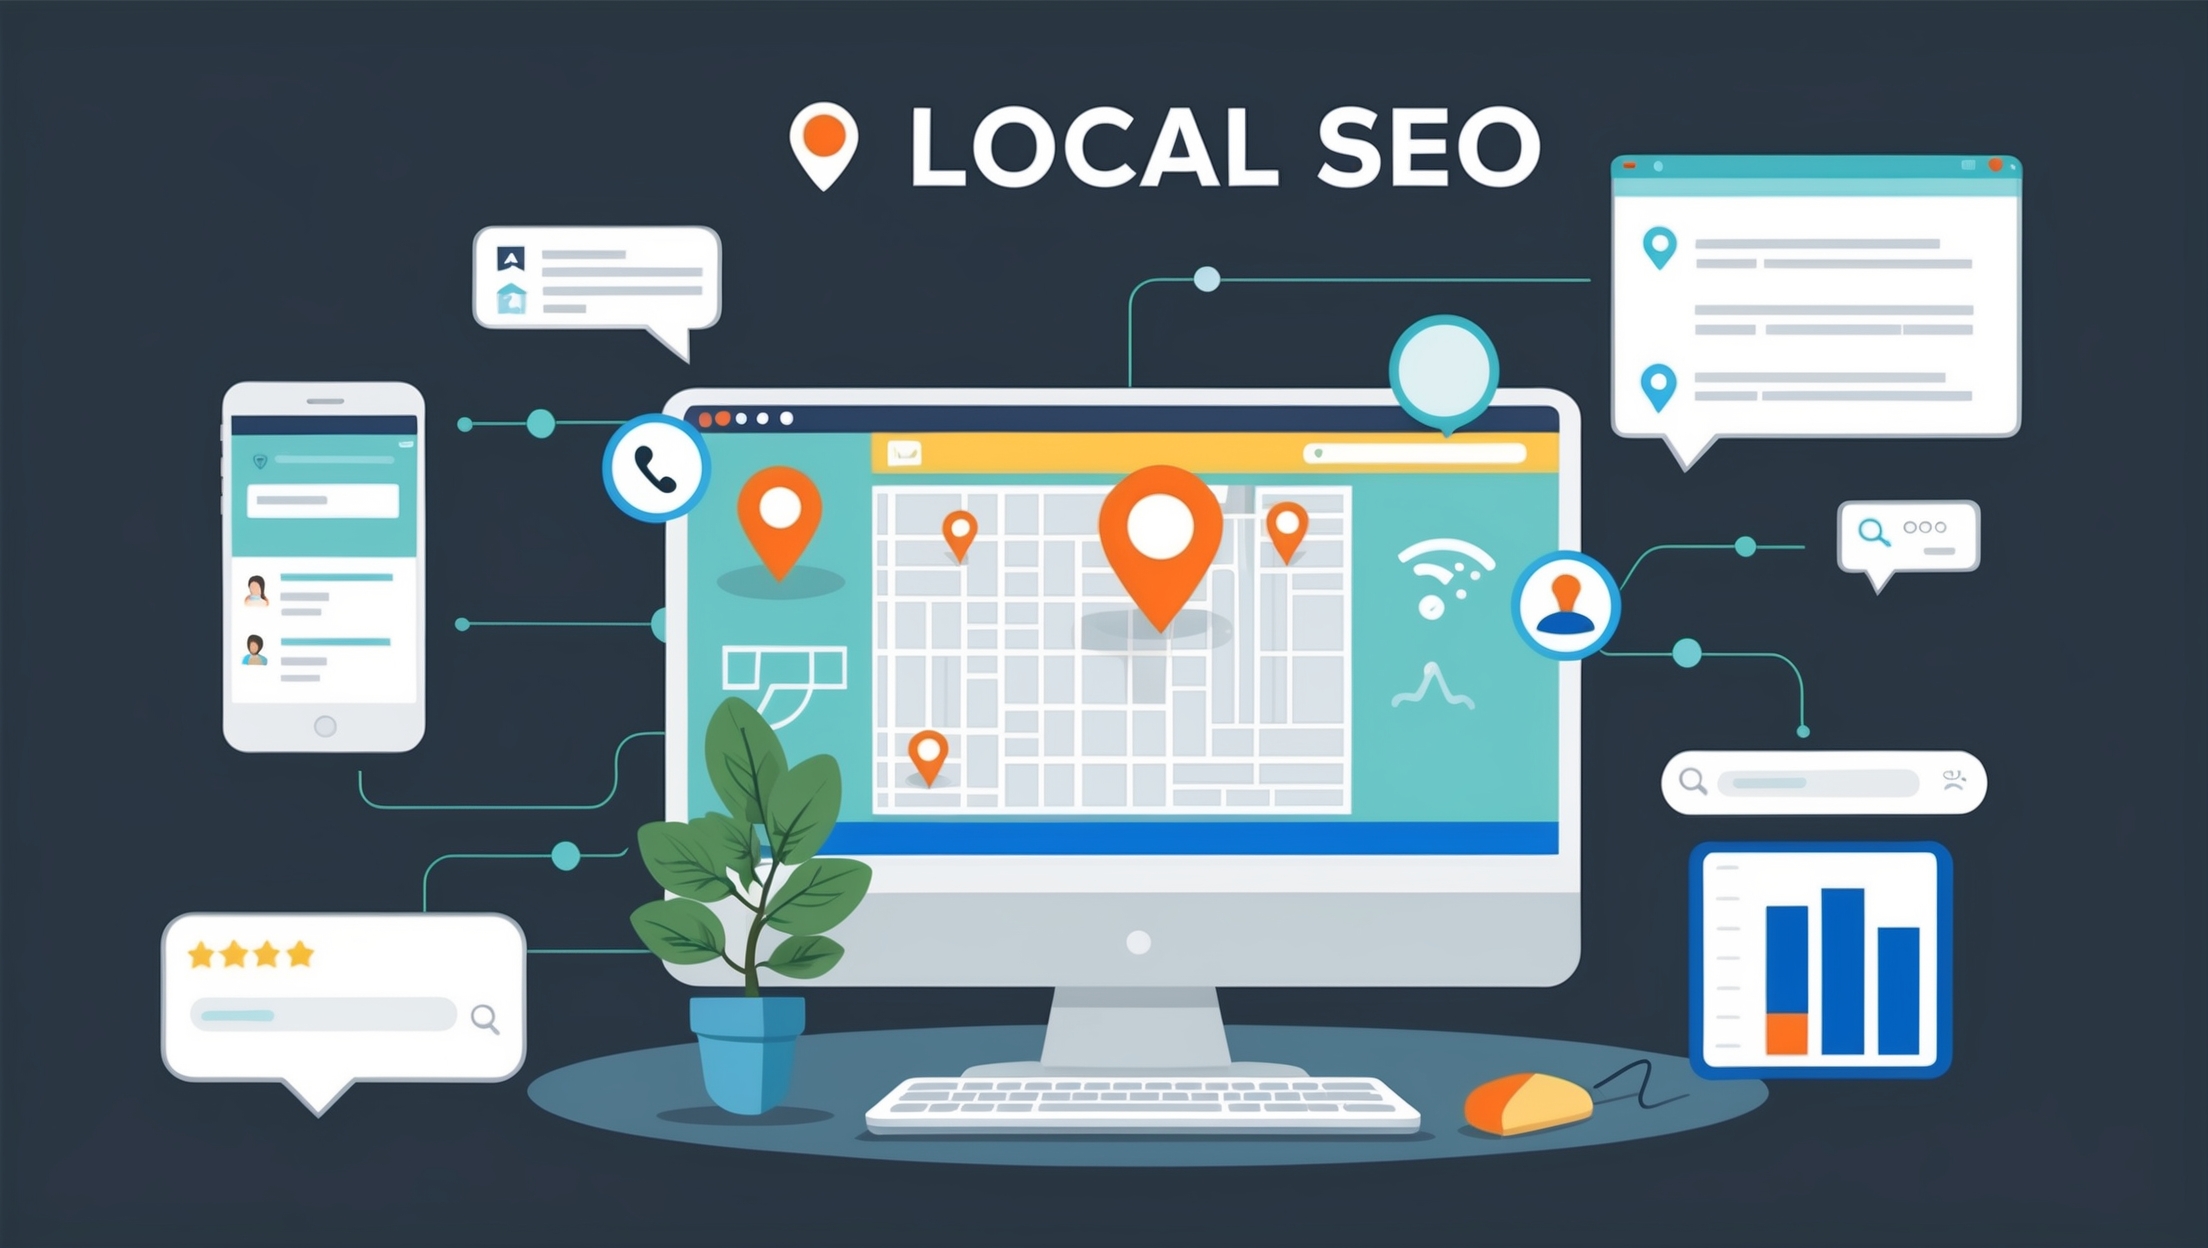
For businesses serving customers in a specific area, local search engine optimisation is a distinct workstream. This covers:
- Google Business Profile management,
- Local citation building across UK and Irish directories,
- Geo-targeted landing pages, and
- Review strategy.
If your customers search for services in Belfast, Northern Ireland, or specific towns and counties, local SEO directly affects whether you appear in the map pack and local organic results. Our dedicated Belfast SEO and Northern Ireland SEO pages cover local service delivery in more detail.
Transparency is a core part of how we work. Monthly reports cover:
- Ranking movements for all target keywords,
- Organic traffic trends by page and intent segment,
- Conversion metrics tied to organic visitors,
- Competitor movement,
- Work completed in the period, and
- Priorities for the following month.
Quarterly strategy reviews ensure the roadmap stays aligned with your business goals as the competitive landscape shifts.
“At ProfileTree, we’ve spent over 15 years perfecting our SEO strategies, and the results speak for themselves. We don’t just aim for rankings; we focus on driving real business growth for our clients across Belfast and Northern Ireland. SEO isn’t about tricks or shortcuts; it’s about creating valuable content, ensuring technical excellence, and understanding exactly what your customers are searching for.” — Ciaran Connolly, Founder, ProfileTree
SEO for AI Overviews and Generative Search
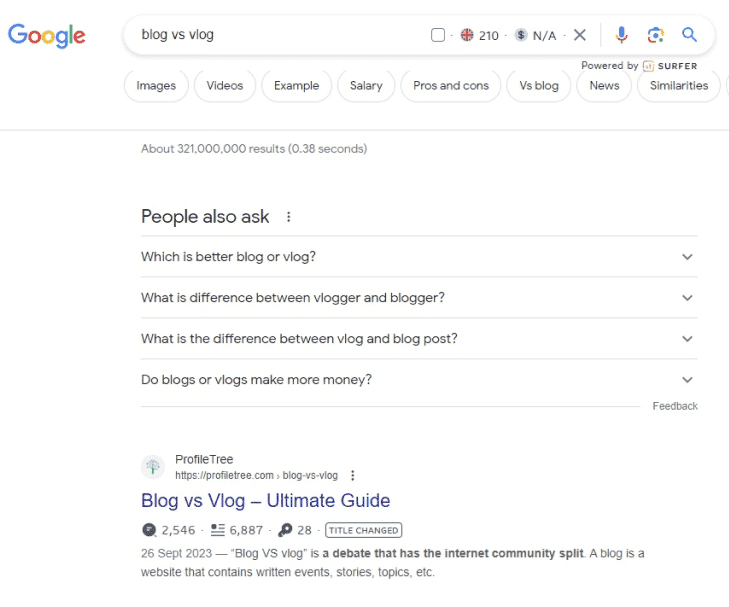
Search is changing. Google AI Overviews now appear at the top of results for a growing number of queries, synthesising answers from multiple sources before a user clicks anything. ChatGPT, Perplexity, and Gemini all draw on web content when generating responses to commercial queries.
Being cited in these answers requires a different approach than simply ranking on page one. Content needs to be structured so that individual sections can be extracted and cited independently. Answers need to be self-contained within roughly 40 to 60 words. Statistical claims, original data and first-person experience make content more likely to appear in AI-generated summaries.
ProfileTree was one of the first agencies in Northern Ireland to incorporate Generative Engine Optimisation (GEO) into its standard search engine optimisation process. We structure client content to satisfy both traditional ranking factors and the citation requirements of AI search tools. For businesses targeting decision-makers who increasingly use AI assistants for research, this matters now, not in three years.
Do You Actually Need SEO Right Now?
Search engine optimisation is the right investment for some businesses and the wrong one for others at a given point in time. Being clear on this upfront saves everyone time.
Signs You Are Ready for Search Engine Optimisation
You are likely ready for search engine optimisation if:
- Your customers search for what you do before they buy it,
- You are currently invisible in Google results for your core services, or
- You are running paid search campaigns that generate leads but cost more per acquisition than you would like long-term.
Organic rankings reduce cost-per-click dependency over time; a well-ranked page generates enquiries without ongoing ad spend.
When Paid Search Makes More Sense First
You may be better served by paid search first if:
- You need leads within the next four to eight weeks,
- Your site has significant technical or content problems that need fixing before rankings will move, or
- Your market is so local and relationship-driven that search volume is genuinely minimal.
Search engine optimisation requires a foundation worth building on; if that foundation is not in place, the audit will tell you what needs to happen before a campaign makes sense.
How Most Northern Ireland Businesses Use Both
Most ProfileTree clients use both channels, with paid search covering immediate demand while SEO builds the organic foundation. Once organic traffic reaches a critical level, paid spend can often be reduced without losing overall enquiry volume. If you are unsure which applies to your situation, the free audit is the fastest way to find out.
What Makes ProfileTree Different from Generic SEO Agencies
There are hundreds of SEO agencies serving the UK and Irish markets. Most offer the same packaged services at similar price points with similar monthly reports. Here is what distinguishes how ProfileTree works.
Results You Can Verify
Our own websites rank for thousands of keywords in Google’s top 10. When we recommend a strategy, we are applying the same methods to your site that we use on our own properties. That is a straightforward proof point most agencies cannot offer because most agencies do not have high-performing websites of their own.
Six-Month Agreements
ProfileTree works on six-month initial agreements rather than locking clients into twelve to twenty-four month contracts. Six months is enough time to complete a full technical overhaul, build out a content base, and demonstrate meaningful ranking movement. If we are not delivering by month six, you should not be tied in for another eighteen months. This structure keeps us accountable in a way that long-term contracts do not.
Generative Engine Optimisation
AI-powered search tools now drive real commercial traffic. Google AI Overviews, ChatGPT and Perplexity all draw on web content when generating answers to commercial queries. Structuring content to be cited in these answers is part of every campaign we run, not an optional add-on. Most agencies have not yet built this into their standard process.
Local Team, Global Standards
ProfileTree was founded in Belfast in 2011 and has completed over 1,000 web and digital projects for businesses across Northern Ireland, Ireland and the UK. We understand local search behaviour, the nuances of targeting both Northern Ireland and Republic of Ireland audiences simultaneously, and the specific sectors where Belfast businesses compete hardest for organic visibility. We are not a remote team managing your campaign from a dashboard; we are your neighbours.
Ready to Dominate Google Rankings? Get Your Free SEO Audit Today!
What ProfileTree's SEO Process Looks Like
Knowing what to expect from your SEO agency is reasonable. Vague monthly reports with rising "impressions" and no explanation of what changed are a waste of your retainer. Here is how our process works from initial contact to ongoing delivery.
Phase 1: Discovery and Baseline Audit
Before any strategy is proposed, we need to understand where your site currently stands. Our discovery phase covers:
- Current ranking positions and traffic sources,
- Technical health across the full site,
- Competitor keyword gaps and content weaknesses,
- Backlink profile strength relative to your market, and
- User experience signals, including Core Web Vitals.
This audit typically takes five to seven working days. You receive a written report with prioritised recommendations before any contract is signed.
Phase 2: Strategy and Roadmap
Based on the audit findings, we build a twelve-month SEO roadmap tailored to your business. This is not a generic template. It accounts for:
- Your specific competitive environment,
- The search terms your customers actually use, and
- The commercial goals you want organic search to support.
The roadmap includes a keyword targeting plan, a content calendar, a technical improvement timeline, a link-building target list, and defined KPIs for months three, six and twelve.
Phase 3: Implementation
Strategy without execution is worthless. Our implementation work runs monthly and includes:
- Technical fixes and ongoing monitoring,
- Content creation and optimisation to the content calendar,
- Link building and digital PR outreach,
- Local SEO improvements, including Google Business Profile management, and
- Conversion rate optimisation on high-traffic pages.
We maintain transparency throughout: every piece of work is logged and explained in plain English.
Phase 4: Reporting and Refinement
Our monthly reports cover:
- Ranking movements for target keywords,
- Organic traffic trends by page and by intent segment,
- Conversion metrics tied to organic visitors,
- Competitor movement analysis,
- Work completed in the period, and
- Priorities for the following month.
We hold quarterly strategy reviews to ensure the roadmap reflects any changes to your business priorities or the competitive landscape.
Who ProfileTree's SEO Services Are For
Our search engine optimisation work serves SMEs across Northern Ireland, Ireland and the UK. We work particularly well with businesses in sectors where local search intent is strong:
- Professional services,
- Healthcare,
- Hospitality,
- Trades,
- Retail, and
- Specialist manufacturers.
If your customers search for what you do before they buy, you have an organic search opportunity worth developing.
The ROI of Search Engine Optimisation: What to Expect and When
The honest answer to “how long does SEO take?” is that it depends on four things: how competitive your target keywords are, the current technical state of your site, the quality gap between your existing content and what is already ranking, and how consistently the work is maintained.
For most SMEs in Northern Ireland working in moderately competitive sectors, the realistic timeline looks like this. Months one to two are primarily technical and structural work with little visible ranking movement. Months three to four typically show initial ranking improvements on lower-competition terms and long-tail queries. Months five to six see broader movement and the first meaningful organic traffic increases. Months seven to twelve are where compounding begins, and commercial return becomes measurable.
What Search Engine Optimisation Costs and What Affects the Price
SEO pricing varies widely because the work required varies widely. A local trades business targeting one town needs a fundamentally different investment to a professional services firm competing nationally. Understanding what drives cost helps you evaluate proposals from any agency, including ours.
Typical Budget Ranges for SMEs in Northern Ireland and Ireland
- Foundational SEO covering technical health, on-page optimisation and basic link building typically runs £1,000 to £1,500 per month.
- Growth-stage campaigns incorporating content creation, digital PR and more active link building sit at £2,000 to £3,500 per month.
- Enterprise work with dedicated account management, unlimited page optimisation, and custom reporting sits above that.
For SMEs across Northern Ireland and Ireland, realistic budget ranges look like this. We give specific budget guidance after the discovery audit, not before, because the right investment level depends on what we find.
The Four Factors That Most Affect Your SEO Investment
Four things most directly determine what your campaign will cost.
How competitive your target keywords are
Ranking for "solicitor Belfast" requires more sustained effort than ranking for "structural engineer Omagh."
The current state of your site
A technically broken website needs remediation before rankings will move, which adds time and cost early in the campaign.
How much content needs to be created or improved
Thin, poorly targeted content is the most common reason sites plateau despite technical work.
Your geographic scope
Local Northern Ireland targeting is less demanding than UK-wide or international campaigns.
What Our SEO Clients Say
These reviews reflect what working with ProfileTree’s SEO and digital team actually looks like. They are from verified Google reviews by business owners and professionals who have used our services directly.
"Brilliant Company. ProfileTree assessed my website for SEO & Performance, they came back with a list of changes that I should implement on the website.
About three weeks after implementing the changes my website was positioned just below eBay and above Argos, before making the changes we were on page 3 of the google search results.
Further to this, ProfileTree then helped me develop a digital marketing strategy by creating a template video format that I will use to develop more videos with the intention to then upload the videos to YouTube and link the videos back to my website.
Throughout this entire process the staff at ProfileTree were patient with me and extremely professional. I look forward to working with you all again in the future."
Martyn Watters
"It has been an absolute pleasure working with Nuala at ProfileTree. I started working with profileTree to broaden my knowledge of social media marketing and SEO to drive traffic to my website.
She has really helped me fully understand what SEO and the importance of improving SEO to increase my web site traffic, and on forward planning social media content, to get the most out of media marketing.
Her wealth of experience is so beneficial for mentoring start up business owners like me, who have little to no experience in these fields. Her friendly and bubbly personality helps to keep the mentoring fun and engaging too! Thank you so much Nuala!"
Colleen Ohlrich
"I have received excellent support from ProfileTree this past month. I am a sole-trader in need of plenty of advice on social media advertising and improving my site's SEO.
I have gathered a huge amount of information thanks to the one-to-one support provided by Profile Tree and look forward to working my way through their suggestions in the coming months. Highly recommended."
Trevor Veale
"The team at ProfileTree is extremely helpful with quick responses and turnarounds for dealing with website issues, and providing excellent training in WordPress, Google ads, and SEO. BeyondHR has been working with Padraig and Eimear over the last few months, who both go over and above to ensure we are getting all the help and information we need."
Orlaith Mcaliser
Ready to find out where your site currently stands?
Our free SEO audit is available to businesses across Belfast, Northern Ireland, Ireland and the UK. Call 028 9568 0364, email hello@profiletree.com, or visit us at McSweeney Centre, 31 Henry Pl, Belfast BT15 2AY.
Follow us on our Facebook page and subscribe to our YouTube channel for all the latest news!
Frequently Asked Questions About Our Search Engine Optimisation Services
For most SMEs in Northern Ireland, initial ranking movements appear in months three to four for lower-competition queries, with broader traffic gains visible by months five to six. Competitive keywords in sectors like legal services or financial advice may take nine to twelve months to show page-one positions. The timeline depends on your site’s current technical health, the competitiveness of your target terms, and how consistently the work is maintained. ProfileTree gives clients milestone projections at the strategy stage, so expectations are set in writing before work begins.
For SME-level work in competitive Northern Ireland and UK markets, realistic budgets start at £1,000 to £1,500 per month for foundational SEO covering technical health, content optimisation and basic link building. Growth-stage work incorporating content creation, digital PR and more aggressive link building typically runs £2,000 to £3,500 per month. Enterprise campaigns requiring dedicated account management, unlimited page optimisation and custom reporting sit above that. Budget guidance is always given after a discovery audit because the right spend depends on what we find, not on a standard package.
No ethical agency guarantees specific ranking positions, and neither do we. Google’s algorithm considers hundreds of signals and updates frequently. What we guarantee is a defined, transparent process, monthly reporting on every metric that matters, and honest communication if something is not working as expected. Our own websites ranking for thousands of competitive keywords are the most credible proof we can offer that our methods work.
Paid search delivers traffic the moment a campaign goes live and stops the moment you stop paying. Search engine optimisation takes longer to build but generates traffic without ongoing cost per click. For most Northern Ireland SMEs, the practical answer is to use paid search for immediate lead generation while building organic rankings over six to twelve months. Once organic traffic reaches a critical level, paid spend can often be reduced without losing overall volume.
Yes. Local search engine optimisation is a distinct discipline that covers Google Business Profile management, local citation building, location-specific landing pages, and geo-targeted content strategy. If your customers search for services in a specific area, local SEO directly affects whether you appear in the map pack and local organic results.
AI Overviews from Google, plus citation-based answers in ChatGPT, Perplexity, and Gemini, now appear at the top of results for many commercial queries. This means content needs to be structured for extraction and citation, not just for ranking. Sections should be self-contained, answers should be concise and direct, and statistical claims carry more weight than qualitative statements. ProfileTree incorporates Generative Engine Optimisation into standard SEO work because the shift to AI-assisted search is already driving commercial traffic, not a future possibility.
Technical SEO refers to the behind-the-scenes factors that affect how search engines crawl, index and rank your pages. This includes site speed, mobile responsiveness, Core Web Vitals scores, crawl errors, schema markup, XML sitemaps, internal linking and duplicate content management. Technical issues act as a ceiling on what even excellent content can achieve. A page with strong content but poor Core Web Vitals scores will consistently rank below a comparable page that loads faster and renders correctly on mobile.
Not necessarily. WordPress is the strongest platform for search engine optimisation out of the box and is what ProfileTree builds and optimises on most commonly. Shopify works well for e-commerce SEO. Wix and Squarespace have improved significantly but still have technical limitations for complex SEO work. Platform migration is only worth considering when the current platform is genuinely blocking progress, not as a general rule. Our audit will flag any platform-specific issues that are worth addressing.

Web Design
We design stunning, user focused websites that present your brand beautifully and convert visitors into customers.

Web Development
We use the latest development tools to build websites that are optimised for peak performance at all times.

Website Hosting
We manage everything from site updates and reports to hosting, allowing you to focus on running your business.

Search Engine Optimisation
Using the latest SEO techniques, we help your brand get found for the right terms and by the right people.

Digital Marketing Strategy
Navigate the digital landscape with a marketing strategy. Our team crafts comprehensive plans that resonate with your target audience, drive engagement, and boost conversions.

Digital Marketing Training
Elevate your digital proficiency. Our in-depth training sessions equip your business with cutting-edge digital marketing techniques to outperform competitors and thrive online.

Social Media Strategy
Captivate and grow your social following. We create tailored social media strategies that ignite engagement, amplify your brand's online presence, and foster lasting connections.

Email Marketing Solutions
Harness the power of your mailing list. Our precision-targeted email marketing campaigns are engineered to nurture relationships and drive tangible business outcomes.

Content Marketing Services
Elevate your brand with our content marketing mastery. From thought-provoking blogs to eye-catching infographics, we craft content that captivates, informs, and converts your ideal audience.

Video Production
Capture your audience with compelling video content. Our production team creates visual stories that engage, inform, and leave a lasting impression.

Brand Storytelling
Bring your brand's story to life with authenticity. We craft compelling narratives that strike a chord with your audience, forging a powerful emotional bond with your brand.

Content Strategy Development
Strategic content that drives action. We develop content strategies that align with your business goals, ensuring every piece of content counts.

AI Training
Empower your business with AI expertise. Our tailored training demystifies AI, equipping your team with the knowledge to leverage its potential for growth and innovation.

AI Chatbots
Transform customer service with AI chatbots. We develop sophisticated chatbots that elevate user experience, streamline interactions, and deliver unparalleled efficiency.

AI Marketing
Transform your reach with AI-driven marketing. Harness data-driven insights for laser-targeted campaigns that captivate, engage, and convert your audience.

AI Tools for Business
Optimise your operations with cutting-edge AI tools. We integrate intelligent solutions that streamline processes, enhance efficiency, and support data-driven decision-making.
Join Our Mailing List
Grow your business with expert web design, AI strategies and digital marketing tips straight to your inbox. Subscribe to our newsletter.