Vlogging Accessories: Equipment to Improve Your Video Content Quality
Table of Contents
Vlogging has transformed how businesses and creators connect with audiences through video content. Whether you’re recording product reviews, business updates, or educational content, the right vlogging accessories make the difference between amateur footage and professional-quality videos that engage viewers and drive results.
The equipment you choose directly impacts video quality, audio clarity, and production efficiency. From stabilisation gear that eliminates shaky footage to lighting setups that ensure you’re always well-lit, each accessory serves a specific purpose in your content creation workflow.
This guide covers the essential vlogging accessories you need to produce high-quality video content. We’ll examine microphones for clear audio, lighting equipment for professional presentation, stabilisation tools for smooth footage, and additional gear that streamlines your production process. For businesses looking to establish a strong video presence, ProfileTree’s video marketing services can help you develop an effective content strategy alongside the right equipment choices.
What is a Vlog?
Before talking about vlogging accessories, let’s set things clear about what a vlog is. A vlog is essentially a video blog. It’s an alternative method of blogging where the medium you use to deliver your content is video instead of text. With the current streaming technology and internet speeds we have, vlogging is more viable for content creators and more conventional for followers.
Vlogs can be very entertaining and informative, but above all, they allow followers to multitask. You can easily watch a vlog while eating or doing a chore like cooking. This makes them preferable to some other texts, which require more attention.
Vlog VS Blog
Should you start a vlog or a blog, video vs text? Both media have their benefits and strengths.
Vlogging, for example, is easy to consume, making it simpler for your followers to stay updated. It also allows you to tell a story and connect with your followers on an emotional level. Vlogging lets you reach a personal connection with your followers; they are more ready to listen to you and believe you because vlogs aren’t much different from what people do on social media.
Vlogging, of course, requires more work and money spent at first to set up a vlog. But the investment made in vlogging accessories is more than worth it once you have established yourself and got a vlog going.
A blog is, of course, easier to set up than a vlog. It also allows you to benefit from SEO techniques, which allow users to find you through search engines when used correctly. This allows for more visibility. However, it’s more difficult to grow such a personal relationship with your readers as in a vlog.
In many cases, the best option is to set up a vlog and a blog that go hand in hand. That’s because many people prefer to watch a video in addition to text. Such a good example of this is College Info Geek, which runs both a blog about student tips and success in student life as well as a vlog.
Word to the Wise: Choose a Niche
Before going forward and doing a rundown of vlogging accessories, you need to remember your niche. A niche is essentially the main theme of your blog or vlog. Whether you decide to run a vlog, a blog or both, you need to figure out your niche.
Choosing a niche to be both profitable and interesting is beyond the scope of this guide. You just have to remember to do your research on your vlog niche and your topics first and foremost.
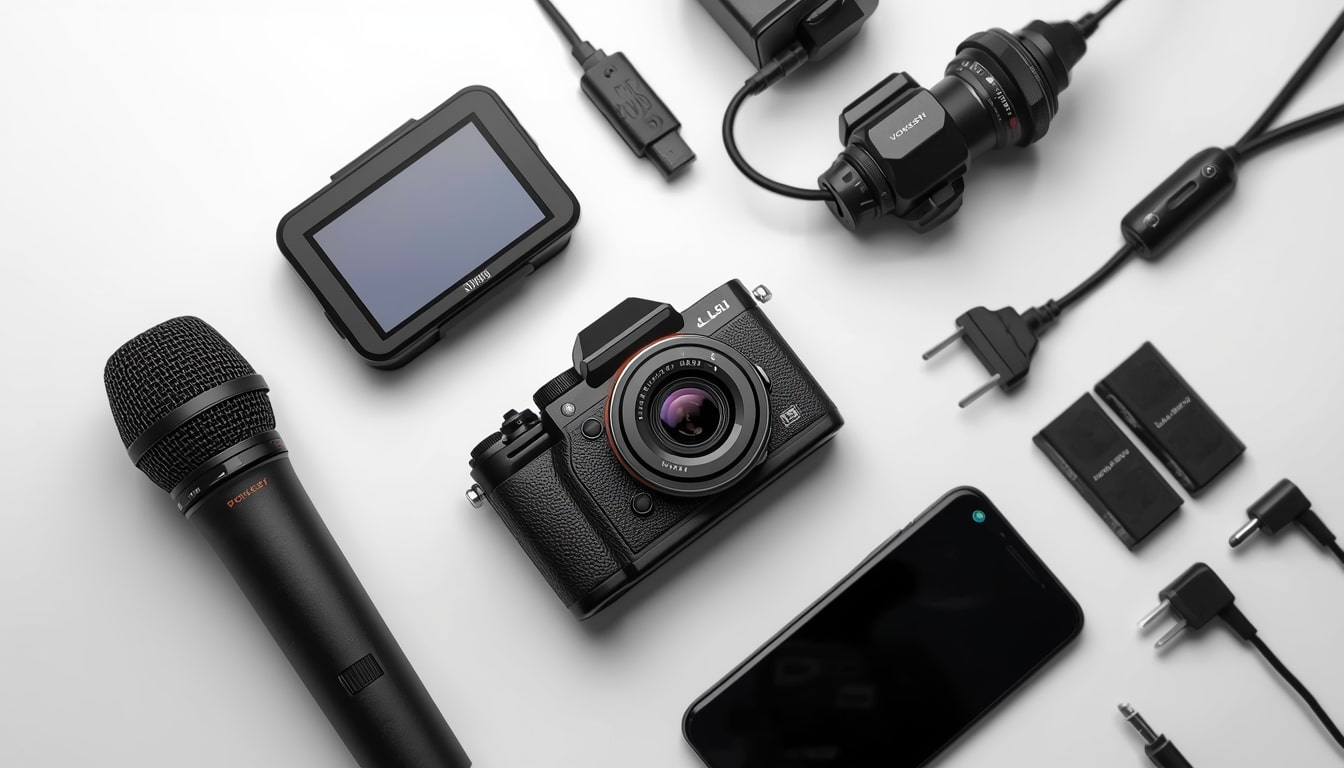
Vlogging Accessories 101
When starting your vlog, you may look at some of the vlogging veterans and their arsenal of vlogging equipment. However, don’t be discouraged because you don’t need to start with all the gear. Many successful vlogs started with little equipment and a smartphone camera.
You don’t need a drone if you’re doing a vlog about cooking or makeup. If your vlog is about hiking and outdoor activities, you should invest in one. Each niche will have its specific needs naturally.
This guide here isn’t about the needs of specific types of vlogs. It’s about the general vlogging essentials. It’s about the various things you’d need to get started and produce high-quality videos.
Cameras
It’s a video blog. The number one piece of vlogging accessories you need is a good camera. You can give up various things in your vlogging accessories, but without a camera, you have no vlog.
Don’t worry, though, you don’t have to pay an arm and a leg for a good camera. However, before we talk money, you need to know your priorities when choosing a camera.
Features You Should Care About
Cameras in our day and age come with various features that make your life a lot easier. Those features can help improve the quality of your videos, making sure your work stands out. That will make people watching your videos fall in love with the content and come back for more.
Video quality comes at the top of the list of the features you should care about. Many vloggers release their content in 720p, 1080p or 4K. You don’t have to go all the way up to 4K, but you should aim to remain at least at 720p. The resolution should be in the camera description.
Low-light performance comes next. Since most of your vlogging will be done indoors, you want a camera that handles low-light environments well. You may think that you’re working indoors and will have your lighting (which has an entire section in this guide). However, you should still care about low-light performance if you don’t want noisy images.
Optical image stabilisation (OIS) is next on the list. Some may think it’s unnecessary. However, if you plan on making any kind of activity while holding the camera (like walking from the front door to your room) you want OIS. Think about the last video you watched that was shaky and how bad that experience was. Remember, you want optical image stabilisation and not the inferior digital stabilisation.
Next up is built-in Wi-Fi. With built-in Wi-Fi, you’re going to save some precious time on moving your videos to your PC for editing. And editing takes a lot of time, so you might as well save some time on the transfer. You will also want this feature if you plan on uploading live videos to YouTube or Facebook.
Another feature that may be the most important on this list is a microphone input port. Most cameras come with a built-in microphone, but its quality is subpar. Viewers come for video quality but stay for clear sound. You will probably want to invest in a microphone (there’s also a section on them below), but without a microphone port, you may have some trouble.
Features You Shouldn’t Really Care About
A Camera is your main piece of vlogging accessories, but you don’t care about every single feature. Some features and numbers are useful if you’re into photography or just want a camera for the holidays. However, these features shouldn’t matter to a vlogger, and you might as well cut some corners.
The Zoom feature is the worst offender in this list. It’s not a feature you should care about as a vlogger since the majority of your shots will be close up. You shouldn’t really care about the zoom power of the camera or how a zoomed picture looks (an exception to this may be travel vloggers, who may care about zoom).
Next up on this list is the flash. As mentioned above, there’s an entire section about lighting. You’ll have to give much care and effort into perfecting your lighting because it can make or break your efforts as a vlogger. This means you won’t be really using the built-in flash of your camera.
Last here, which confuses many people, is megapixels. Megapixels are important if you’re looking for a camera for photography. However, when shooting vlogs, you shouldn’t pay much attention to the number of megapixels.
A camera is your first piece of essential vlogging accessories. If you’re looking at any camera, now or in the future, pay some attention to the criteria mentioned above, and you should be in the clear. To make your life easier, this guide has some recommendations for cameras suitable for vlogging for beginners.
Camera Recommendations
1- The GoPro Hero5: Originally priced at $399 (there’s an offer at the time of writing at just $298.58), it is one of the better options you have. It’s the go-to option for the more adventurous vlogger as it comes with brilliant stabilisation and voice commands, and it’s waterproof (up to 33 ft underwater). It’s perfect for travel and fitness vlogger,s but that doesn’t mean it’s not for those running a vlog from their livingrooms.
The Hero5 also has a wide range of software features from the makers, such as their QuickStories app, allowing you to upload footage to your phone and GoPro plus (a subscription service giving you access to their cloud storage, discounts on accessories and more.
2- Canon PowerShot SX730: Coming at a price of just $379, it’s one of the better options on the market for your money. With Wi-Fi, bluetooth and NFC, it’s simply easy to transfer your footage and videos from your camera to your smartphone or computer. You can also easily upload your videos to the internet for livestreams on YouTube and Facebook (improving follower engagement). One feature that stands out here is the 3-inch tilt screen, which allows you to see yourself while recording.
3-Sony a5100: Coming at a slightly higher price than the other cameras, the a5100 at $548 is worth every penny. A mirrorless camera that allows you to attach different lenses for better videos while remaining slim compared to DSLR cameras. This one comes with an ultra-fast auto focus feature, so you never miss a beat and WiFi. If all this doesn’t convince you, it comes with a flip-up LCD so you can see how you look when taking videos alone.
4-Your phone: Smartphones have come a long way since they first hit the market. Many of the features and specs mentioned above come in many of the high-end phones. If you own a high-end phone released this year or the last, you probably have a good camera on the back. Just to be clear, vlogging with smartphones isn’t new, and it’s suitable as far as vlogging for beginners goes.
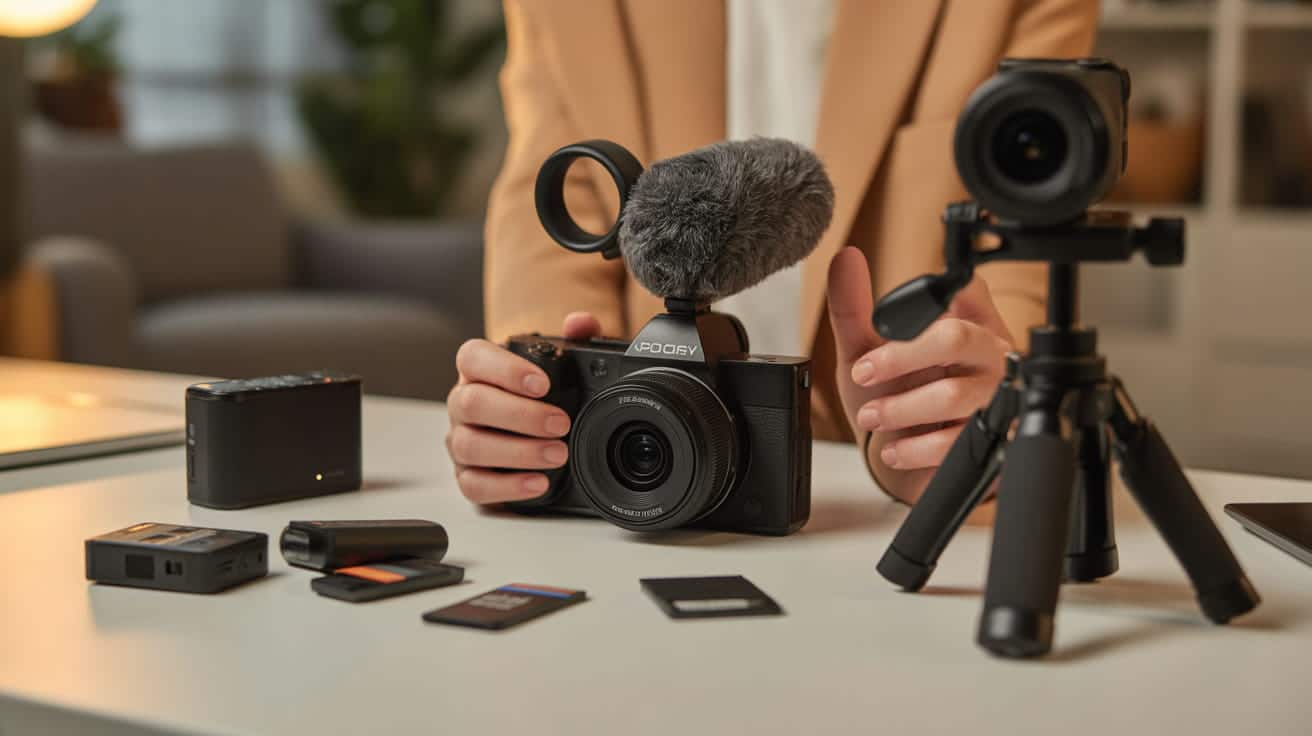
Audio
If people are going to come to your vlog for the great footage quality, they will stay for the great and clear sound. People want to hear what you have to say, and they want to hear it loud and clear. They don’t want to spend time listening to static noise that could be avoided. How do you avoid static noise? By stepping up your microphone game. Microphones are perhaps as important as vlogging accessories as your cameras. The cameras and microphones team up to be some of the most important vlogging essentials.
“Don’t cameras have microphones?” you ask. Many do actually have microphones, but the quality of those microphones isn’t good for professional or semi-professional vlogging. This is why a good microphone is the next investment you’ll make on your hunt for vlogging accessories.
Before choosing a microphone, you have to know some of the different specifications. Microphones come mainly with three types of connections: 3.5 mm output, XLR and USB. You need to know what type of cable your mic has and know if your camera or recording device is compatible with this. You also need to know if it has a proper mount to attach to your camera.
First, you need to know what types of microphones are on the market. Here’s a rundown of some of the more common microphone types, their advantages and some recommendations.
The Shotgun Microphone
Shotgun microphones come with more than just a cool name. These microphones are very directional, meaning they pick up sound mostly from the direction you point them in. This also means they pick up little background noise from the sides and rear. These microphones can be attached to the camera you use (preferably if you are close to the camera) or mounted on a boom stand. Most think of the man holding a stick with a microphone on film sets when boom stands are mentioned. However, you could buy a boom microphone stand that comes with a tripod to set it out of camera view to record if you work alone.
Something to note about shotgun microphones is their power requirements. These mics often require power (known as phantom power). Depending on its connection, the power source may change. An XLR microphone may get its power from your camera or recording device. A microphone with a 3.5mm pin will have to rely on different power sources, like a battery or a camera’s hot shoe.
Shotgun Microphone Recommendations
1-TAKSTAR SGC-598: This microphone is one of the best for those on a tight budget. At a price of just $26.87, you get every penny you pay for. Normally, good shotgun mics are expensive, and the more you pay, the better the mic you get. However, this microphone is good for beginners and doesn’t cost an arm and a leg if you’re on a tight budget. It comes with a 3.5mm pin and not an XLR output, and gets energy from a 1.5V AA battery.
2- Rode VideoMic: Once you get into the world of vlogging accessories, you will hear the name Rode again and again. They make some of the best audio equipment on the market, and this microphone is no exception. Although it comes at $129.99 (a noticeable jump from the TAKSTAR), it’s the better option if you have the money to spare. It comes with a 3.5mm output and operates with a 9V battery.
3- Rode VideoMic Pro: Rode scores another place on this list, and that’s just how good their microphones are. At a price of $215, it’s a jump from the other Rode phone mentioned here, but you get what you pay for. This microphone comes with a 3.5mm output and requires a 9V battery to run.
The Lavalier Microphone
A lavalier mic (known in the world of vlogging as a ‘lav’) is the kind of small microphone used in interviews and talk shows. It’s small and attached to the collar close to the mouth with a clip or tape. You’ve probably seen it being torn and flung away by angry people after an interview or a heated discussion on television.
The lavalier microphone is the piece of vlogging accessories you use for maximum mobility. It’s also perfect for situations where you’re not facing the camera, such as instructional videos. It comes in two variants, wired and wireless.
Wired vs Wireless
Each of those has its own advantages. Wireless microphones often allow you to monitor audio in real-time to make sure it is working, and if the receiver is connected to the camera, it syncs audio to video automatically. However, good wireless microphones often come at higher prices than good wired ones.
Wired microphones come at more budget-friendly prices. However, when connected to something other than your camera (phone or recorder), you can’t test the audio while working. If something goes wrong in the middle or the audio quality isn’t good, you may need to repeat. This also means that you’ll need to spend more time editing the video to sync the video and audio, which are separate.
All in all, both have their advantages, but it depends on how much money you spare. Many beginners prefer to buy wired mics while shopping for vlogging accessories and slowly upgrade when the time is right.
Lavalier Microphone Recommendations
1-The Audio-Technica ATR-3350IS: Audio-Technica is known to make some of the best sound equipment, be it microphones or headphones, at great prices. Coming at a price of just $29, this phone can connect to your video camera, DSLR, handheld audio recorder or even your smartphone. It comes with batteries anda smartphone adapter.
It’s definitely one recommendation for beginner vlogging equipment.
2-The Rode smartLav+: Yet another microphone coming from Rode at great quality. The original price of this microphone is $90, but at the time of writing, it goes for $65.98. This microphone takes its power from the device it is connected to.
This microphone is made to work with smartphones in mind, especially iPhones. However, it comes with a 3.5mm pin, and iPhones no longer have 3.5mm jacks since iPhone 7. This means that if you own a newer iPhone, you should consider buying an adapter.
If you plan to attach it to a camera or a video recorder, you’ll need to buy their SC3 adapter.
3-The Comica CVM-WM100: This is the wireless pick for this list. While most wireless lav microphones cost a lot more than their wired counterparts, this one comes at a price of just $188.99, a very reasonable price for a wireless microphone, given that the cheaper ones often sacrifice some audio and build quality.
With up to 100 meters of working distance and real-time audio monitoring, this microphone is a great pick. Another great feature of this microphone is power consumption control, meaning that you can use low strength if you’re working within a smaller range (60 meters) and save energy. It is powered by 2 AA batteries.
The USB Microphone
If your setting is at home in your room, or if you’re doing an instructional (or make-up) vlog, you probably have a computer close by. If you have a computer as part of your setting or vlog work, you may connect the microphone directly to it through USB. USB microphones often offer great quality and maximum control over your microphone.
USB microphones are very versatile. From using them in podcasts or interviews to recording music, they can accommodate your needs.
USB Microphone Recommendations
1-The Blue Yeti: You can’t talk about USB microphones without mentioning this one. Coming at a price of $125.43, it’s one of the best USB microphones you can get. It allows you to switch between 4 different recording patterns and comes with gain control. It also comes with a 3.5mm jack to plug a headphone to monitor what it records in real time.
2-The Audio-Technica AT2020USB+: Another microphone by Audio-Technica at a price of $129. This company makes superb equipment and some of the best vlogging accessories. This microphone comes with only one pattern (cardioid), which reduces noise pickedup from the rear and sides.
It comes with a 3.5mm headphone jack for real-time audio monitoring and mix controls (if you want to blend the microphone signal with pre-recorded audio). It’s geared more towards musical work, but it works perfectly for most stationary vlogging needs, voice-over and podcasts.
3-The Blue Snowball iCE: The Snowball is another microphone by the makers of the Yeti. However, it’s more budget-friendly and comes at a price of around $46.99. It’s simple to use, just plug it in and start recording. It is compatible with Mac and Windows software and requires no additional installations. It’s also a cardioid microphone worth every penny you pay.
Support
When support comes to mind I want you to think of a tripod. A tripod is the next item on our hunt for vlogging accessories. It plays an important role because it’s complementary to another piece of vlogging accessories: the camera.
Unlike cameras and microphones, there’s not much high-tech stuff going on behind tripods. They are purely mechanical, and there aren’t that many features. What you should look for in a tripod is build quality and sturdiness because you don’t want something to break.
Apart from sturdiness, one should consider the desired heightthat a tripod extends to. Choosing the perfect height depends on where you want to place your camera. If your camera is placed on a desk, you can opt for a shorter tripod. However, if you want to place the camera further or in a place where there’s no surface for it, you may opt for a longer tripod.
One last tip, if you’re travelling and choose the GoPro as your camera, you may want to consider a good selfie stick. It’s often used in this situation to capture the scenery behind you or to capture an experience like jumping into water. It may turn some heads and make you self-conscious, though.
Tripod Recommendations
1-The Joby GorillaPod: In this case, a specific price can’t be written because there are many models. Models vary in the maximum height they reach and the maximum weight they hold. This means you have to first choose the camera and know its weight and the height you need before buying. However, there’s no need to worry. Joby made a video and a chart to help you choose.
This tripod is one of the best in the market; you have to consider it. Its legs have multiple joints, which can bend to allow for multiple configurations and even wrapping them around a pole. This is achieved with no compromise in quality, making it one of the more versatile vlogging accessories you can have.
2-The Manfrotto PIXI EVO: If anything stands out about this tripod is what the company advertises: it’s compact and light. At a price of $40.38, this tripod comes with extended legs and is made of 2 sections, allowing for a 90-degree camera tilt.
If you’ve been geared toward lighter vlogging accessories and bought a lighter camera, this is your tripod. It doesn’t come with the versatility of the GorillaPod, but if you aren’t going to really use that mobility, you might as well pick something lighter.
3-The Magnus VT-4000: If your camera choice was a little heavier or if you decided you need the extra height, this is your tripod. The VT-4000 comes at a price of $140.52, but considering its specs, it’s actually a budget tripod.
The height of the VT-4000 ranges from 70cm to 150cm. Its weight is 3.6 kilograms, and it can hold up to 4 kilograms. It’s equipped with ground spikes for outdoor use and rubber tips for more delicate indoor floors.
Lighting
Next up on the hunt for vlogging accessories is lighting. Lighting can make or break your footage; no matter how good your camera is, it’s not much use with bad lighting. Lighting, however, isn’t all about buying equipment and gadgets.
All you need is to have effective lighting. It should put you or your partner in front of the camera in focus while avoiding strange shadows on your face and features. To this end, you may use natural light from strategically located windows or the ambient lighting available in the room you use.
Natural light is as powerful as any lighting vlogging accessories you can get; it’s even more powerful. However, it’s good to be consistent throughout your work as it allows you to create an identity or a brand for yourself. Maintaining your identity is the first step to having people remember you and come back for more content.
Even though natural light can do wonders, it can’t be controlled for consistency. Unless you keep a schedule up to the minute to make sure of the sun’s position and control the weather and clouds, you can’t be perfectly consistent. It’s for these reasons that if you still have money allocated for vlogging accessories, you should consider lighting equipment.
It’s essential to start by knowing what lighting equipment you can find.
Softbox Lights
Think of it as an artificial window. It works by passing the light through a diffusion panel to simulate what natural light would be like. They are often on the cheaper side of things, making them great as vlogging equipment for beginners.
Umbrella Lights
Umbrella lights are the next step in the lighting game. Their advantage over softboxes is the directional control they give you, and so more customisation.
Ring Lights
Ring lights are considered the best at imitating natural light while maintaining consistency. It’s because technically the sun is the biggest ring light this world will ever see. They can give you a great boost and produce uniform lighting.
Lighting Kits
To save time for people shopping for vlogging accessories, some companies made kits that come with various equipment that you may need. These kits often have a variety of equipment for different configurations.
Lighting Recommendations
1-The Neewer Dimmable 18 inches Ring Light: This one is practically a kit, coming with all the equipment you need to set up and start. It comes with its stand and even colour filters at a price of only $89.99.
2-The Impact Soft n’ Natural Kit #3: This is a great kit pick if you want to buy one. It features most of what you need to get started, from octa softboxes, normal softboxes, to fixtures and stands. It comes at a medium range price of $129.
FAQs
How much should I budget for vlogging accessories as a beginner?
Plan to spend £150-300 for essential starter equipment: basic microphone (£50-80), LED light panel (£40-60), and flexible tripod (£30-50). This covers fundamentals without overspending on features you won’t use initially.
What’s the single most important vlogging accessory to buy first?
A quality external microphone delivers the most impact. Audio quality affects viewer retention more than visual elements—people tolerate average video but abandon content with poor sound. A £60-80 shotgun or lavalier mic transforms production value immediately.
Do I need a gimbal, or will a tripod work for vlogging?
Your recording style determines which you need. Tripods suit stationary content like product demonstrations or interviews. Gimbals work for walking shots, location tours, or event coverage requiring smooth movement. Start with a tripod if recording from fixed positions.
Can I use natural lighting instead of buying lighting equipment?
Natural lighting creates consistency problems—window light changes throughout the day, limiting recording schedules and creating colour variations between videos. Basic LED panels (£40-80) provide consistent results regardless of time or weather, essential for maintaining regular upload schedules.
What’s the difference between shotgun and lavalier microphones for vlogging?
Shotgun mics mount on cameras and capture directional audio, ideal for solo vloggers recording from consistent distances. Lavalier mics clip to clothing near your mouth, providing consistent quality regardless of camera distance or movement. Choose based on your recording setup and mobility needs.
How do vlogging accessories differ for indoor versus outdoor recording?
Indoor recording requires more lighting equipment but offers controlled audio environments. Outdoor recording needs wind protection for microphones, portable power solutions, and potentially ND filters for bright sunlight. Plan purchases based on where you’ll record most frequently.
Should I invest in a separate audio recorder or use camera audio inputs?
Recording directly to your camera simplifies editing by keeping video and audio synchronised automatically. Separate recorders offer better quality but require syncing during editing. For business vlogging, camera-mounted systems provide the best balance of quality and workflow efficiency.
Conclusion
Your vlogging accessories should match your content goals and production environment. Start with audio: a quality microphone transforms video professionalism more than any other single upgrade. Add lighting to ensure a consistent, flattering presentation regardless of location. Include stabilisation gear if you’re recording on the move or need smooth camera movements.
Budget your equipment purchases strategically. Begin with essentials like a reliable microphone and basic lighting, then expand as your content develops. Many successful vloggers started with minimal gear and upgraded incrementally as they identified specific needs through regular production.
Most businesses approach video content with either no equipment planning or excessive spending on gear they don’t need yet. The sweet spot is investing in quality audio and lighting first, then adding specialised accessories as your content strategy evolves and you understand your actual production requirements,” says Ciaran Connolly, founder of ProfileTree.
Consider how your vlogging accessories integrate with your broader content marketing approach. Video content works best as part of a comprehensive digital strategy that includes written content, social media, and SEO. For businesses in Belfast and Northern Ireland looking to develop effective video content strategies, ProfileTree’s content marketing services combine equipment guidance with strategic planning to maximise your video content ROI.