How to Add Hotjar Tracking Code to Your Wix Website
Table of Contents
If you run a Wix website and want to understand exactly how visitors interact with your pages, knowing how to add Hotjar to Wix correctly is one of the most practical steps you can take. A Hotjar Wix integration gives you heatmaps, session recordings, and feedback surveys, replacing guesswork with real behavioural data.
This guide covers every method for installing Hotjar on Wix correctly, including the newer Wix Studio interface, with GDPR compliance guidance that most installation guides overlook.
Quick-Start: Add Hotjar Tracking Code to Wix in Three Steps

For those who need the essentials quickly, here’s the short version. You’ll need a Wix Premium plan to access the Custom Code feature, and your Hotjar Site ID from your Hotjar dashboard. The full Hotjar Wix installation walkthrough is in the next section.
- Log in to Hotjar and copy your Site ID from the dashboard (Settings > Site Information).
- In your Wix dashboard, go to Settings > Custom Code > Add Custom Code.
- Paste the Hotjar tracking code, set it to load in the Head on All Pages, save, and publish your site.
That’s the core Hotjar installation process on Wix. The sections below explain each step in full, covering Wix Classic, Wix Studio, and the compliance steps UK businesses must not skip.
What is the Hotjar Tracking Code?
The Hotjar tracking code is a JavaScript snippet you add to your website’s head section. Once the Hotjar Wix integration is active, it connects your site to your Hotjar account and begins collecting behavioural data about how visitors use your pages.
What data does the Hotjar tracking code collect?
After the Hotjar tracking code is installed on your Wix website, Hotjar can capture a range of user behaviour signals depending on which features you have enabled in your account.
- Heatmaps: click maps, move maps, and scroll maps showing where attention is concentrated on each page. A Wix heatmap powered by Hotjar is one of the most direct ways to spot layout and CTA problems.
- Session recordings: anonymised replays of individual visitor sessions, useful for spotting navigation confusion or form drop-off.
- Surveys and feedback widgets: on-page prompts to gather direct user input at a specific moment in their journey.
- Conversion funnels: step-by-step tracking to see where users abandon a process, such as a checkout or sign-up flow.
- Form analysis: field-level data showing which inputs cause hesitation or errors.
This combination makes the Hotjar Wix integration particularly useful for conversion rate optimisation. Rather than guessing why a page converts poorly, you can watch recordings and check heatmaps to find the actual friction points. If you want support applying those insights at a strategic level, our digital strategy services can help you act on what the data reveals.
What do you need before adding Hotjar to Wix?
Before adding the Hotjar tracking code to your Wix website, make sure you have the following in place.
- A Wix Premium plan. Free Wix sites don’t have access to the Custom Code area, which is where the Hotjar tracking code must be added.
- A Hotjar account. Sign up at hotjar.com and create a new site to receive your unique Site ID.
- Editor access to your Wix site. You’ll need owner-level permissions to add custom code.
- A published domain. Hotjar won’t verify the tracking code on Wix preview URLs. You must use your live published domain to confirm the Hotjar Wix installation is working.
How to Install Hotjar on Wix: Full Walkthrough
Understanding how to add Hotjar to Wix correctly makes the difference between accurate data and a broken setup. The right method depends on your Wix version and compliance requirements.
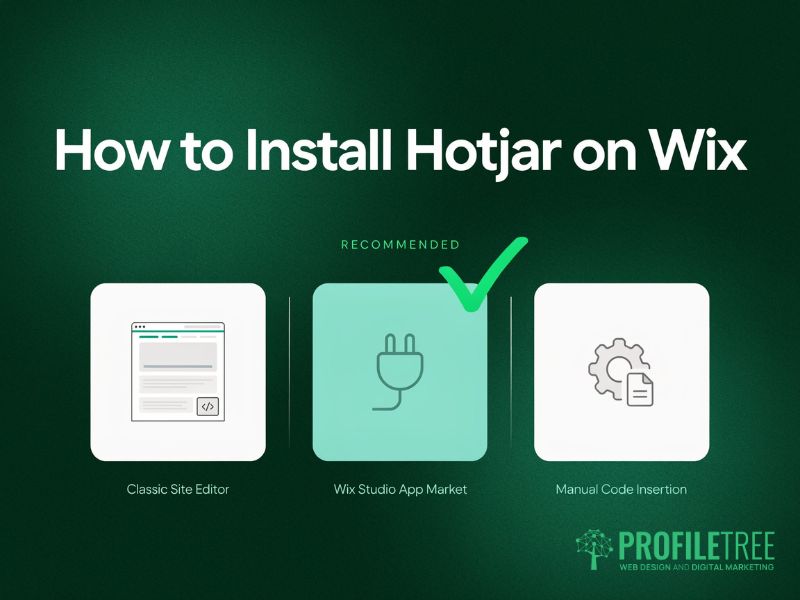
The Hotjar Wix installation process differs slightly between the classic Wix editor and the newer Wix Studio environment. Both methods use the Custom Code area in the Wix dashboard. Don’t attempt to add the Hotjar tracking code through the Wix App Market; the app version loads more slowly, updates less frequently, and gives you less control over consent timing.
Method 1: Wix Classic Editor
This is the most widely used Hotjar installation method and works for the majority of Wix sites.
- From your Wix dashboard (not the editor), go to Settings in the left-hand menu.
- Scroll to find Custom Code under the Advanced section and click it.
- Select Add Custom Code in the top right corner.
- In your Hotjar account, go to Settings > Site Information and copy your full tracking script (not just the Site ID).
- Paste the Hotjar tracking code into the code field in Wix. Name it something clear, such as ‘Hotjar Tracking’.
- Set the Load Code Once option to All Pages.
- Under Add Code to Pages, set placement to Head. Placing the Hotjar tracking code in the body means heatmaps can’t capture your site’s CSS correctly, leading to misaligned overlays.
- Click Apply, then publish your site for the changes to take effect.
Method 2: Wix Studio
Wix Studio is the professional interface replacing Wix Editor X. For a Wix Hotjar setup on Wix Studio, the Custom Code area is accessed differently from the classic editor, and this is where many guides become outdated.
- Open your project in Wix Studio and go to the dashboard (the home icon in the top-left panel).
- Go to Settings > Advanced > Custom Code. You’ll see a different UI from classic Wix, with code placement managed by page group rather than individual pages.
- Click Add Code and paste your Hotjar tracking code.
- Select Head placement from the dropdown and set the scope to All Pages.
- Save and publish. Wix Studio caches aggressively, so allow five to ten minutes before testing the Hotjar Wix installation.
One issue specific to Wix Studio: internal preview mode doesn’t fire external scripts. Test only on your live published URL, not the editor preview.
Method 3: Wix App Market (and why to avoid it)
Hotjar is available as an app in the Wix App Market. While it’s technically simpler to install than the manual method, there are practical reasons to avoid this route for any business using Hotjar on Wix seriously.
- The app version loads via an additional layer, which adds to page weight and increases the risk of slowing your Core Web Vitals scores.
- App Market versions of tracking tools update more slowly than the direct script, so you may not get new Hotjar features as they’re released.
- The app gives you limited control over when the Hotjar tracking code fires, which creates a specific compliance problem: you can’t easily delay tracking until after a user consents via your cookie banner.
The manual Custom Code method gives you full control and keeps your data clean. If you want to know how to add Hotjar to Wix with compliance built in, Custom Code is the only route worth taking.
Hotjar on Wix: Installation Methods Compared
This table summarises the key differences between the three ways to add Hotjar to Wix.
| Factor | Custom Code (Manual) | Wix App Market |
|---|---|---|
| Setup complexity | Moderate (5 minutes) | Simple (2 minutes) |
| Page speed impact | Minimal (async load) | Slightly higher |
| GDPR/consent control | Full control | Limited control |
| Script update speed | Immediate (direct) | Delayed (app release cycle) |
| Wix heatmap accuracy | High (Head placement) | Variable |
| Recommended | Yes | No |
GDPR and PECR Compliance for UK Wix Users
This is the section most Hotjar installation guides skip, and it is the one UK businesses cannot afford to ignore. Every Wix Hotjar setup that records user sessions must comply with UK GDPR and PECR. You can’t load session recording tools before a user has given active consent; the ICO has issued fines for exactly this type of non-compliant tracking.
The consent-gate problem with Hotjar on Wix
The core issue is timing. If the Hotjar tracking code fires as soon as a visitor lands on your page, before they’ve clicked ‘Accept’ on your cookie banner, you’re collecting behavioural data without consent. This is a PECR violation regardless of whether the data is anonymised, and it applies to every Hotjar Wix integration running on a site with UK or EU visitors.
The correct setup requires your Hotjar tracking code to wait until the user has actively consented via your cookie management tool. Here’s how to achieve this on Wix.
Setting up consent-conditional loading
Wix has a built-in cookie consent banner, but its integration with third-party scripts is limited. For consent-gating the Hotjar tracking code on Wix, you have two options.
Option A: Using Hotjar’s Advanced Tracking settings
Hotjar provides an Advanced Tracking option that delays data collection until a user action triggers it. In your Hotjar account, go to Settings > Site Settings > Advanced Tracking and enable suppress recording. You’ll then add a small JavaScript call to your cookie banner’s Accept callback to activate the Hotjar tracking code. This requires developer involvement but gives you clean compliance.
Option B: Using a consent management platform
A more reliable approach is to use a consent management platform (CMP) such as CookieYes or Cookiebot alongside your Wix site. These platforms integrate with Wix and manage script firing based on consent categories. Assign Hotjar to the ‘Analytics’ category; the CMP fires the Hotjar tracking code only after the user accepts analytics cookies. For a Hotjar Wix integration serving UK or Irish visitors, this is the more defensible approach.
ProfileTree builds websites for businesses across Northern Ireland and the UK where data privacy compliance is a commercial requirement. If your site needs a compliant analytics architecture built in from the start, our web design services can handle the full setup.
Wix Heatmaps and Session Recordings: Making the Most of Your Data

Adding the Hotjar tracking code to your Wix website is the easy part. Getting useful insights from your Wix Hotjar data requires understanding what each feature is showing you. The Wix heatmap tools and session recordings within a Hotjar Wix integration are most valuable when you know what questions to ask.
Does the Hotjar tracking code slow down your Wix site?
The Hotjar tracking code loads asynchronously, so it doesn’t block your page rendering. In practice, it adds a small overhead of roughly 50 to 100ms, depending on server response and active recording volume. For most Wix sites, this won’t affect Core Web Vitals materially.
Two things help minimise the impact. First, restrict Hotjar on Wix to the pages where the data is actually useful. If you run a service business, you don’t need the Hotjar tracking code running on your privacy policy or thank-you confirmation page. Limit tracking to pages in your conversion funnel. Second, use Hotjar’s sampling rate settings to record a percentage of sessions rather than all of them on high-traffic pages.
How to read your Wix heatmap data
A Wix heatmap powered by the Hotjar tracking code gives you three types of visual data, each answering a different question about how visitors use your pages.
- Click maps show where users click most frequently. If visitors are clicking on non-interactive elements like images or headings, that’s a strong signal they expect those elements to be links.
- Scroll maps show how far users scroll down the page. A sharp drop-off point in your Wix heatmap data tells you where you’re losing attention; any key content or calls to action below that line should be moved up.
- Move maps track cursor movement on the desktop, giving a loose proxy for where users read versus skim. Wix heatmap move data is most useful for evaluating above-the-fold layout decisions.
A scroll map showing 70% of visitors leaving before your contact section is an immediate signal to restructure the page. The Wix heatmap data removes the guesswork from layout decisions.
Using Hotjar session recordings on Wix
Session recordings are most useful when a page has a high exit rate, but the reason isn’t clear. After setting up Hotjar on Wix, watching recordings from that page typically reveals the pattern: a confusing form field, a button hidden on mobile, or navigation pulling users away before they find what they need.
Combine session recording data with your Google Analytics data to build a complete picture. Hotjar on Wix shows you the ‘how’ of user behaviour; GA4 shows you the ‘what’ and ‘how many’. For help connecting your full digital analytics stack, our digital marketing services team can set up an integrated tracking solution for your Wix site.
Troubleshooting Your Hotjar Wix Installation
If your Wix Hotjar setup shows ‘Tracking Code Not Detected’ after the Hotjar installation, there are several common causes worth checking. Most are straightforward to fix once you know where to look.
You tested on the Wix Preview URL
This is the most common reason for a false negative when adding the Hotjar tracking code to Wix. Wix’s internal preview mode doesn’t execute custom code or third-party scripts. Test only on your live published domain. Open the site in a fresh browser tab using the public URL, then return to Hotjar to verify. Allow a few minutes for the Hotjar tracking code to register activity.
You forgot to publish after saving
Clicking Apply saves the Hotjar tracking code in your Wix Custom Code area but doesn’t make it live. Publish your site first. To confirm the Hotjar installation is active, right-click your published URL, choose View Page Source, and search for ‘hotjar’. If it’s there, you’re live.
The Hotjar tracking code is in the Body instead of the Head
If you placed the Hotjar tracking code in the body section during setup, your Wix heatmap overlays won’t align correctly with the page layout because the script loads after the CSS has rendered. Return to Settings > Custom Code, find your Hotjar entry, and change placement to Head.
Wix caching is serving an old version of the page
Wix applies caching at both the server and CDN levels. After publishing, it can take five to fifteen minutes for the updated page, including your newly added Hotjar tracking code, to be served consistently. If the code is in place but Hotjar still shows as unverified, wait fifteen minutes and try again from a different browser.
Multiple Hotjar tracking code instances are detected
If you’ve previously tried to install Hotjar via the Wix App Market and are now switching to the manual method, you may have two copies of the Hotjar tracking code running simultaneously. Open Settings > Custom Code and check for duplicate entries. Also, check the Wix App Market to confirm the Hotjar app is disconnected. Remove one instance completely before retesting the Hotjar Wix installation.
FAQs
1. Can I use Hotjar on a free Wix site?
No. Adding the Hotjar tracking code to Wix requires the Custom Code area, which is only available on Wix Premium plans. Free Wix sites don’t include this feature. If you’re on a free plan, sign up for a Hotjar account in advance so your tracking code is ready; once you upgrade to Premium, the Hotjar on Wix installation takes under five minutes.
2. Should I add the Hotjar tracking code to the Head or Body in Wix?
Always the Head. The Hotjar tracking code needs to load before your page CSS renders so it can map element positions correctly. Placing the script in the body breaks the Wix heatmap overlay alignment. When setting up the Hotjar tracking code in Wix Custom Code, always select Head from the placement dropdown.
3. Is the Hotjar Wix integration GDPR compliant for UK websites?
Hotjar, as a platform, provides data anonymisation, IP masking, and data retention controls that align with UK GDPR. The compliance question isn’t about Hotjar itself but about how you implement it. If the Hotjar tracking code fires before a visitor consents via your cookie banner, that’s a PECR violation. Configure your Hotjar Wix integration so the script activates only after consent is given. The full steps are in the compliance section above.
4. Why does Hotjar say ‘Tracking Code Not Detected’ on my Wix site?
The most common causes are testing on the Wix Preview URL rather than the live domain, forgetting to publish after saving the Hotjar tracking code, or Wix caching an older page version. Check that the script is in the Head section and that you’ve published the site. If you’re unsure how to add Hotjar to Wix correctly, revisit the installation section above for the step-by-step method. If the problem persists, check for duplicate Hotjar installation entries left from a previous App Market attempt.
5. How do I add the Hotjar tracking code to a specific page on Wix, not all pages?
In Wix Custom Code, edit your Hotjar tracking code entry and change the ‘Load Code Once’ setting from All Pages to Specific Pages. You can then pick individual pages from a list. Restricting your Wix Hotjar setup to high-value pages, such as a product page or contact form, reduces performance overhead and keeps data focused where it matters most.