Dreamweaver vs WordPress: Which Web Design Tool Should You Use in 2026?
Table of Contents
Choosing between Dreamweaver vs WordPress is one of the first and most important decisions you will make when building a website. Whether you are a Belfast small business owner scoping your first digital presence, a freelancer weighing up tools for client work, or a developer deciding where to invest your learning time, the Dreamweaver vs WordPress question deserves a proper answer, not a surface-level feature list. At ProfileTree, a Belfast-based web design and digital marketing agency, we work with both platforms daily across client projects spanning web design, SEO, content writing, and AI training. This guide gives you the honest, practical breakdown you need.
The Dreamweaver vs WordPress comparison is not simply about which tool is easier or cheaper. It is about understanding two fundamentally different philosophies of web development, and knowing which philosophy fits your goals. One gives you complete control over every line of code; the other gives you the speed and flexibility to build and manage content-driven websites without needing to write a single tag. Both have their place in a modern digital workflow. The question is where you fit within that picture.
1. IDE vs CMS: The Core Difference Between Dreamweaver and WordPress
Before comparing features side by side, it is worth understanding what these two tools actually are. Dreamweaver vs WordPress is not a comparison of two website builders; it is a comparison of two entirely different categories of software, and that distinction changes everything about how you approach your work.
What is Adobe Dreamweaver?
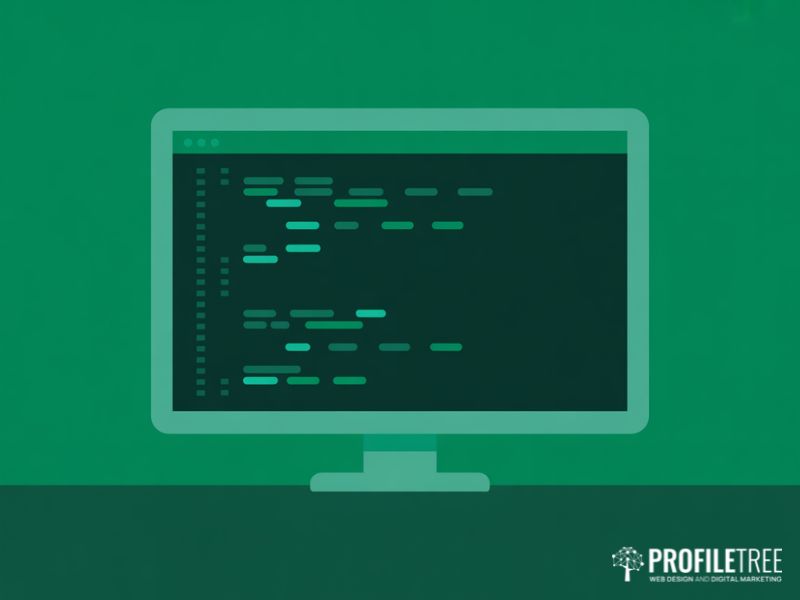
Adobe Dreamweaver is an Integrated Development Environment (IDE). It is software that lives on your computer, and you use it to write HTML, CSS, JavaScript, and other web code manually. When a file is complete, you upload it to a web server using FTP. There is no database, no admin dashboard, and no plugin system. You are the architect, and every element of the site exists because you wrote it.
Dreamweaver is part of the Adobe Creative Cloud subscription, which costs approximately £21.98 per month for a single app or £54.98 per month for the full suite. It is favoured by front-end developers, designers who want pixel-level control, and anyone building sites that prioritise performance and security over content management convenience.
What is WordPress?
WordPress is a Content Management System (CMS) that runs on a web server rather than your local computer. When you build a site in WordPress, you are assembling a structure from themes and plugins through a visual dashboard. WordPress itself is free and open source, but you will need hosting (typically £5 to £20 per month for quality managed hosting in the UK), a domain, and often a selection of premium plugins or themes to build a fully functional site.
Businesses that want a professionally built result often work with an agency offering web design services in Belfast to handle the build, leaving them free to manage content themselves once the site is live. For those who prefer to hand off the ongoing technical side entirely, dedicated WordPress management and security services cover updates, backups, and performance monitoring month to month.
WordPress powers approximately 43% of all websites on the internet. It is the go-to platform for businesses, bloggers, e-commerce stores, and agencies that need to publish and update content regularly without relying on a developer for every small change.
The Dreamweaver vs WordPress Philosophy Gap
The clearest way to frame the Dreamweaver vs WordPress decision is this: Dreamweaver is a carpenter’s workshop and WordPress is a flat-pack assembly kit. Both can produce a finished piece of furniture. The workshop takes longer to learn but gives you complete creative and structural freedom. The assembly kit gets you to a finished product faster, but you are working within the constraints of the design someone else created. Whether you choose to build from scratch or use a managed CMS, the right website development services partner will ensure the end result meets your commercial goals regardless of which platform sits underneath.
Neither philosophy is superior. They serve different goals, different skill levels, and different business models.
| Feature | Adobe Dreamweaver | WordPress |
|---|---|---|
| Software type | IDE (code editor) | CMS (content management) |
| Runs on | Your computer | Your web server |
| Skill required | HTML, CSS, JavaScript | UI-driven, low code entry |
| UK pricing | From £21.98/mo (Adobe CC) | Free software, £5-20/mo hosting |
| Database | None (static files) | MySQL database required |
| Security | Inherently strong (no DB) | Requires ongoing updates |
| Maintenance | Low (static files) | Regular updates needed |
| Content updates | Requires developer edits | Client can self-manage |
| AI integration | Adobe Sensei (code assist) | GPT-powered plugins (content/SEO) |
| Best for | Developers, designers | Businesses, bloggers, agencies |
2. Ease of Use and Learning Curves: What No One Tells You
When people debate Dreamweaver vs WordPress, ease of use is always cited as WordPress’s decisive advantage. That is broadly true for beginners, but the full picture is more nuanced. The WordPress learning curve does not end at the dashboard; it extends into plugin management, theme conflicts, GDPR compliance, and ongoing maintenance. Understanding both learning curves makes for a more honest assessment.
Getting Started with WordPress

WordPress is undeniably faster to launch. You can install it on a hosting server in minutes, choose a theme, install a page builder like Elementor or the built-in Gutenberg block editor, and have a professional-looking homepage live within an hour. This accessibility is one of the strongest arguments for WordPress, particularly for business owners who want to manage their own content going forward. Getting clear on your goals before you build is important; pairing your platform choice with sound digital strategy support ensures the site is structured to serve your audience and generate leads from day one, not just look good at launch.
The Gutenberg block editor, introduced in 2018 and now the default WordPress editing experience, has made content management significantly more intuitive. You can add paragraphs, images, buttons, columns, and custom blocks without touching a line of code. For most SMEs in Northern Ireland and across the UK, this level of control is exactly what they need.
However, as you add functionality through plugins, complexity grows quickly. Managing 15 to 20 plugins across a live site, each with its own update cycle, compatibility requirements, and potential security implications, is not something most beginners anticipate when they choose WordPress for its ease. According to W3Techs, WordPress powers over 43% of all websites globally, which reflects both its accessibility and the size of the support community available to new users.
Getting Started with Dreamweaver
Dreamweaver demands foundational knowledge of HTML and CSS before you can build anything useful. For someone without that background, the first week involves learning what a div tag is and how a media query works rather than picking colour palettes. This is the genuine barrier to entry, and it is not trivial.
That said, once you clear that barrier, something interesting happens. Because you built the site from scratch, you understand every element of it. There is no theme framework to fight, no plugin conflict to diagnose, and no admin panel to manage. The maintenance burden collapses. A static HTML site built in Dreamweaver can run for years without a single update, and it will look exactly the same on day 1,000 as it did on day one.
For UK-based freelancers and developers who work with clients across multiple projects, investing in Dreamweaver skills pays long-term dividends in the form of sites that are fast, clean, and virtually maintenance-free.
The 2026 AI Shift: Code Assistance in Both Platforms
One of the most significant developments in the Dreamweaver vs WordPress comparison over the past two years is the integration of generative AI into both platforms. This changes the ease-of-use picture in ways that were not relevant even 18 months ago.
Adobe Dreamweaver now integrates Adobe Sensei, which provides intelligent code completion, error detection, and layout suggestions directly within the editor. For someone learning front-end development, AI-assisted code completion dramatically reduces the time it takes to become productive. Writing a CSS grid layout or a JavaScript event listener with AI guidance is a fundamentally different experience from doing it cold.
WordPress, meanwhile, has seen a surge of AI-powered plugins covering content generation, SEO optimisation, image creation, and even site-building assistance. Tools like Bertha AI, 10Web, and the growing integration of AI models into page builders mean that non-technical users can build more sophisticated sites faster than ever before. For business owners and marketing teams who want to take full advantage of these capabilities, structured digital training programmes provide the hands-on grounding to use these tools effectively. Teams looking to go further can explore how AI marketing and automation can be layered on top of whichever platform they choose to drive efficiency across content, campaigns, and customer communications.
For ProfileTree clients undertaking AI transformation work, understanding how AI tools integrate into their chosen platform is increasingly part of the initial platform decision. This is an area where the Dreamweaver vs WordPress comparison has shifted considerably, and where both platforms now offer genuine AI value.
3. Cost, Security, and Maintenance: The True Total Cost of Ownership
One of the most misleading aspects of the Dreamweaver vs WordPress comparison is the headline cost figure. WordPress is free. Dreamweaver costs a monthly subscription. But a headline cost comparison misses most of the actual financial picture. For UK businesses and professionals, total cost of ownership across a two to three year period tells a very different story.
Breaking Down the Real Costs
A properly built WordPress site carries ongoing costs beyond the software itself. Quality managed WordPress hosting from providers like Kinsta, WP Engine, or SiteGround UK runs from approximately £20 to £80 per month depending on traffic. Premium themes cost between £40 and £200 as a one-off or annual fee. Essential plugins for SEO, security, caching, and forms can add £100 to £400 per year for premium versions. And if you are paying a developer or agency for maintenance, updates, and security monitoring, that is an additional ongoing cost that many businesses underestimate.
Dreamweaver, at approximately £21.98 per month for the single app, includes access to a professional-grade development environment with AI integration. Hosting for static HTML sites is significantly cheaper, often available for £3 to £10 per month, and there are no plugin subscription costs. The main cost is developer time, either your own or a hired professional.
| Cost Component | WordPress (Annual) | Dreamweaver (Annual) |
|---|---|---|
| Software | Free | ~£264 (single app) |
| Hosting | £240 to £960 | £36 to £120 (static) |
| Premium themes/plugins | £150 to £600 | None |
| Security tools | £60 to £200 | Minimal (no DB) |
| Developer maintenance | £300 to £1,200 | Low (static files) |
| Estimated 3-year TCO | £2,250 to £8,880 | £900 to £1,800 |
These are approximate figures for a small business site. Costs vary significantly based on hosting choices, plugin selection, and developer rates. The table illustrates that the Dreamweaver vs WordPress cost comparison is rarely as simple as it appears at first glance.
Security: The Static Advantage

Security is one of the clearest differentiators in the Dreamweaver vs WordPress comparison. WordPress, because it relies on a MySQL database, a PHP backend, and a constantly evolving ecosystem of plugins and themes, presents a substantially larger attack surface than a static HTML site. According to Sucuri’s annual website threat research report, WordPress accounts for a significant majority of all infected websites they investigate, primarily due to outdated plugins, themes, and core files.
This is not a criticism of WordPress as a platform; it is simply the reality of running database-driven software at scale. A properly maintained WordPress site with a quality security plugin, a managed hosting environment, and a rigorous update schedule is genuinely secure. The risk comes from the maintenance burden being dropped or ignored.
A static HTML site built in Dreamweaver has no database to inject into, no PHP code to exploit, and no admin login page to brute-force. For businesses handling sensitive data or operating in sectors where compliance is critical, such as legal, financial, or healthcare, this is not a trivial consideration.
UK businesses also need to consider GDPR compliance. A Dreamweaver static site with no database simplifies data residency and processing significantly. Managing the data privacy implications of 15 WordPress plugins, each potentially collecting and transmitting user data to third parties, adds compliance overhead that many businesses fail to account for at the outset.
4. SEO, Performance, and AI Tools: Which Platform Ranks Better?
The Dreamweaver vs WordPress debate regularly features SEO as a decisive argument for WordPress. The availability of plugins like Yoast SEO and Rank Math, combined with the ease of publishing and updating content, makes WordPress the dominant platform for content-led SEO strategies. But the SEO picture in 2026 is more layered than it was even two years ago.
WordPress SEO: Strengths and Limitations
WordPress excels at content-led SEO. The combination of Gutenberg or Elementor for page building, Yoast or Rank Math for technical on-page optimisation, and plugins for schema markup, XML sitemaps, and Core Web Vitals monitoring gives a competent SEO practitioner an excellent toolkit. For ProfileTree clients, WordPress is almost always the recommended platform for businesses that want to benefit from our SEO services in Northern Ireland, precisely because it empowers non-technical teams to manage content at scale without requiring developer involvement for every update.
The limitation is performance. A WordPress site loaded with plugins, large images, and unoptimised themes can have Core Web Vitals scores that put it at a disadvantage against lean competitor sites. Google’s Page Experience signals, particularly Largest Contentful Paint (LCP) and Cumulative Layout Shift (CLS), penalise slow, unstable pages regardless of how good the content is. A bloated WordPress installation can undo excellent content work.
The solution is caching, image optimisation, a quality CDN, and disciplined plugin management. These are solvable problems, but they add to the maintenance and cost overhead discussed above.
Dreamweaver and SEO: The Performance Argument
A well-built static HTML site from Dreamweaver can achieve near-perfect Core Web Vitals scores. With no server-side rendering, no database queries, and no plugin overhead, pages load fast. Google rewards fast pages. For businesses in competitive local markets, a technically excellent static site can outperform a poorly maintained WordPress competitor despite having less content.
The limitation is content management. Adding a new blog post, updating a service page, or publishing a case study requires a developer to edit files and re-upload them. For businesses running an active content marketing programme, this friction is significant. Without the ability to self-publish, content velocity suffers, and content velocity is one of the strongest drivers of organic growth.
The Hybrid Workflow: Using Both Tools Together
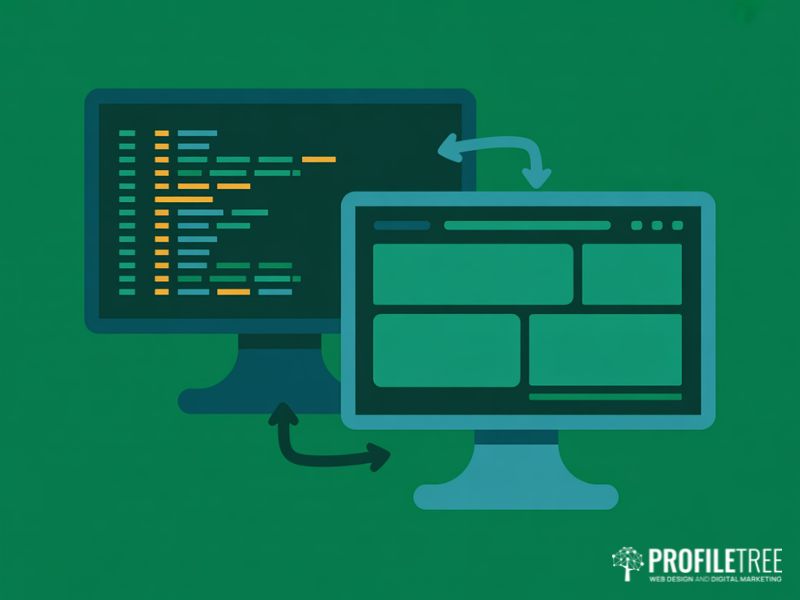
One angle that rarely features in the standard Dreamweaver vs WordPress comparison is the hybrid workflow, yet it is increasingly common among experienced UK web professionals. Designers use Dreamweaver to prototype and develop pixel-perfect CSS layouts, then convert those layouts into WordPress block themes using tools like Pinegrow or by manually enqueuing stylesheets and templates. The result combines Dreamweaver’s design precision with WordPress’s content management capabilities.
This approach is particularly relevant for agencies and freelancers who want to offer clients a bespoke design with a familiar and manageable CMS back end. It is more complex than choosing one platform outright, but for the right project it resolves most of the tensions in the Dreamweaver vs WordPress comparison.
“For most small businesses we work with across Northern Ireland, WordPress is the right choice because it gives them the independence to manage their own content day to day. But when a client comes to us with performance, security, or compliance requirements that go beyond what a managed WordPress environment can deliver cost-effectively, a static build or a hybrid approach is worth the conversation.” — Ciaran Connolly, Founder, ProfileTree
5. Which Platform Is Right for You? A Practical Decision Framework
The Dreamweaver vs WordPress decision ultimately comes down to your goals, your technical background, and how you plan to manage your site after launch. Neither tool is universally better. The right answer depends on which trade-offs you are prepared to make.
Choose WordPress If…
WordPress is the better choice for most businesses, bloggers, and marketing-led organisations. It is particularly well suited when:
- You need to publish content regularly without developer involvement
- Your team includes non-technical staff who will update the site
- You are running an e-commerce store (WooCommerce is the UK’s leading open-source option)
- You need a broad plugin ecosystem for forms, bookings, memberships, or marketing integrations
- You plan to embed video marketing and production content throughout your site and want an easy way to manage multimedia alongside written content
- You want to connect your website to an active social media marketing strategy, with content that can be easily updated to match campaigns
- Your SEO strategy relies on high content volume and regular publishing
Choose Dreamweaver If…
Dreamweaver is the better choice when technical control, performance, and security take priority over content management convenience. It makes sense when:
- You have HTML and CSS skills or are committed to developing them
- You are building a brochure site or portfolio that changes infrequently
- Performance and Core Web Vitals scores are a priority
- You are working in a sector with strict GDPR or data security requirements
- You are a developer or designer who wants to own the code completely
- You are building custom layouts that would require significant theme overrides in WordPress
Consider a Hybrid Approach If…
You are an agency or experienced freelancer who wants bespoke design quality with a client-friendly CMS, and you have the technical capability to bridge both tools. This approach requires a higher initial investment of time but can deliver exceptional results for clients who care equally about aesthetics and manageability.
Making the Right Choice for Your Web Project

The Dreamweaver vs WordPress question does not have a single right answer, and any article that tells you otherwise is oversimplifying. Both tools are professional, capable, and actively developed. Both have genuine strengths and genuine limitations. The Dreamweaver vs WordPress decision should be driven by your goals, your team’s capabilities, and your long-term maintenance model, not by a generic recommendation.
For the majority of UK businesses looking to build a content-driven digital presence, WordPress remains the more practical choice. Its ecosystem, its SEO capabilities, and its ability to put content management in the hands of non-technical teams make it the dominant platform for good reason. The Dreamweaver vs WordPress comparison shifts significantly, however, when performance, security, or custom development are the primary requirements. In those cases, Dreamweaver’s static output and code-level control offer advantages that no plugin can fully replicate.
At ProfileTree, we help businesses across Northern Ireland, Ireland, and the UK make informed decisions about web platform, design, content strategy, and digital marketing strategy. Whether you are building your first website or rebuilding an existing one, we can guide you through the Dreamweaver vs WordPress decision and every step that follows. Since 2011, the team has delivered over 1,000 web projects for businesses at every stage of digital development. If you are ready to take the next step, speak to our web design team in Belfast to discuss your project.
FAQs
Is Dreamweaver still worth learning in 2026?
Yes, if you want a front-end development career or need sites where performance and security are priorities. If your goal is managing content for a business, WordPress is a more practical starting point.
Can you use Dreamweaver and WordPress together?
Yes. Developers commonly use Dreamweaver to build custom WordPress themes by editing theme files directly in the IDE. This hybrid approach can be extended further by adding AI chatbot integration to handle customer queries and lead capture within the WordPress site.
Which is better for SEO: Dreamweaver or WordPress?
WordPress, for most businesses. Its plugin ecosystem makes content publishing and on-page optimisation straightforward for non-technical teams. Dreamweaver produces faster-loading pages, which helps technical SEO, but every content update requires a developer.
How much does it cost to build a site in the UK?
A professionally built WordPress site typically costs £500 to £2,000 to build and £300 to £900 per year to run. A static Dreamweaver site has similar build costs but lower annual running costs of around £100 to £250, not counting developer time for updates.
Is WordPress more secure than Dreamweaver?
No, not inherently. A well-maintained WordPress site is secure, but it requires ongoing effort. A Dreamweaver static site has no database or admin login to attack, making it inherently more resilient with far less maintenance required.
Which platform is better for beginners?
WordPress. You can build a professional site without writing code. Dreamweaver requires foundational HTML and CSS knowledge before you can build anything functional.